Words and photos by Tim Woolcott
|
MGF
Shock absorber bush replacement Words and photos by Tim Woolcott |
Background
| The MGF uses shock absorbers to augment the suspension
damping properties of the hydragas spheres. There is a single damper for each wheel. Each
damper is attached to the bodywork at their top end, and to the upper suspension link at
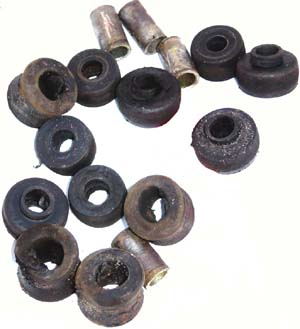
their lower end. At each end, there is a rubber bush, that helps reduce noise and
vibration transmission into the car's interior. However, after 4-5 yrs the rubber bushes
on the shock absorbers begin to deteriorate (as pictured opposite). If you approach your local MG dealership, you will be told that the bushes are not available separately: you have to purchase complete new damper units. This is unfortunate, as the dampers appear to markedly outlast their bushes! Fortunately, there is another solution: polyurethane bushes. So, rather that replacing the whole shock absorber, the rubber bushes can be replaced individually. Polyflex manufacture performance bushes which can be ordered from Mike Satur, B&G and similar for about £10 per set ( 4 sets needed ). The bushes featured here were purchased from Mike Satur (which use stainless steel inserts rather than the cheaper, mild steel ones used in cheaper kits). By following the flowing simple proceedure these can be replace as a DIY process |
 |
Parts required:
Tools required:
Time
How to do it...
Front shock absorbers
| 1 | Jack car and remove wheel. | |
| 2 | Remove under bonnet cowl with 10mm socket and philips screwdriver | |
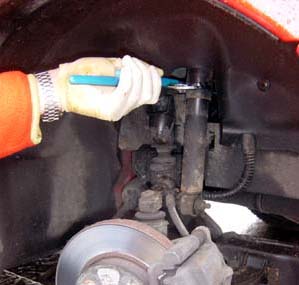
| 3 | Undo lower bolt on shocker (in wheel arch) use large adjustable wrench one side and socket the other. | |
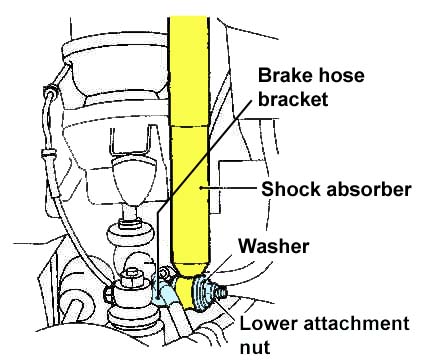
| 4 | Remove top
shocker bolt. When doing so prevent the shocker from twisting by either:a) clamping the top of the shocker sleeve
with 'Mole grip' or similar whilst undoing the nut above (opposite)
or |
 |
| b) by holding an adjustable wrench on the flat-sided top to the shocker thread whilst undoing the shocket head nut with a 14mm ratchet spanner (pictured opposite). | 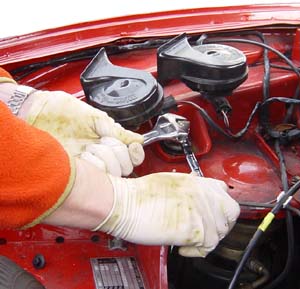 |
|
| 5 | Once shocker removed remove metal sleeve from bottom bush, a srewdriver can be used to prize it out and then the rubber bush pushes out easily. | |
| 6 | Remove the top rubber bush and clean all surface of dirt and corrosion with wire brush or emery paper. | |
| 7 | Liberally cover new bushes with silicon grease supplied | |
| 8 | Insert lower shocker bush with the aid of a vice or hydraulic press | 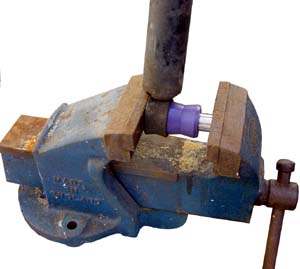 |
| 9 | Locate upper shocker bush librally smeared with grease. | |
| 10 | Re-fit shock absorber:
|
 |
Rear shock absorbers
Follow the above proceedure . Access to the head of the rear shockers is difficult and I would highly recommend that a deep socket set is used with extension pieces.
| Torque Settings | ||
| Front (Nm) | Rear (Nm) | |
| Upper securing nut | 37 | 37 |
| Lower securing nut | 45
|
45
|