How to… fit an alternative
seat into an MGF or MG TF
|
| This page contains: | Introduction | What you'll need | How to do it |
The standard seats found fitted in an MGF and TF are already very good - very comfortable over a long drive, and supportive in all the right places. I've travelled many 100s of miles a day in my F and never had any problems - either with the original seats, or with the TF seats I have fitted since. For road car seats, they are very good. One problem though - you do tend to sit a little high - and we can thank the stiffening box section that goes across the centre of the car for this because the standard seat has to sit on top of it! There are, at the time of writing this article, two solutions for the high seating position: a replacement seat diaphragm and a seat lowering platform. I have not tried them, but I have heard positive reports.
|
|
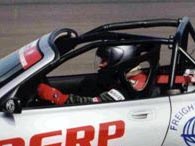
| Above - the Cobra Evolution - as found fitted to the original MGF Cup Cars. Their compact design makes them perfect for the tight space constraints of the MGF cockpit |
The purpose of this page is to cover a project of mine that has had its genesis over a decade ago: how does one fit aftermarket seats into an MGF?
There are some excellent aftermarket seat designs available, and the fixed-back bucket designs are the best if you plan to track your MG frequently - but there are two obstacles to over come. First is the narrow cockpit space available - like the Mk1 MX-5, there is not a huge amount of width available if you want to close the door (always a good idea), and still be able to open the central storage cubbies. The former is rather more important I suspect. The second problem is that there are no aftermarket seat brackets specifically made for the MGF - which means that either the standard seat runners need adapting, or you have to fabricate your own.
As my plan is to take my MGF out on track, I'd like for the mounting brackets to be up to FIA-approvable standards - and this of course represents another design headache... so it has taken me a while to get to get to an affordable solution!
How wide is too wide?
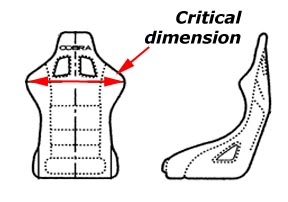 The
key width is across the shoulders on many sports seats - as this shoulder
support area tends to
flare out, and will interfere with the closure of the doors as well as the use of the
centre cubby box. Browsing through the Cobra catalogue suggested that seats that
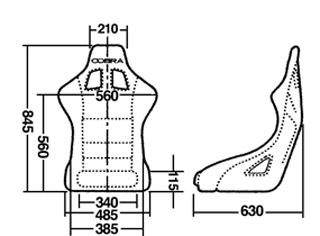
were equal or less than 560mm in this key dimension would fit. Fortunately, this
does not limit one's choice too much: for fixed bucket
designs, the Cobra Clubman, Imola, Imola-S and Monaco would all fit. The
original MGF Cup cars used the Cobra Evolution Pro seats (pictured above right) - so it is no surprise
to find that these fit too. For adjustable back rest seats, the Cobra Sidewinder
ought to fit.
As you can see, I've been plundering through the Cobra seat catalogue - but these are certainly not the only seats available on the aftermarket. Corbeau, Sparco, OMP, Recaro are all good alternatives.
Having established that some of the Cobra seats ought to be a good fit, a group of us (Dave Livingstone, Tim Woolcott, Stu Dickinson and myself) decided to pop up to Cobra's manufacturing base and try out a couple of their seats in one of our MGFs (Dave's as it happens).
Cobra Imola S
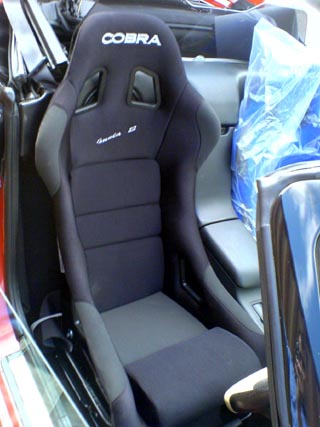 Pictured
left is the Cobra Imola-S. It is a handsome seat design, and is (as the
dimensions suggest) a suitable fit into the MGF Cabin.
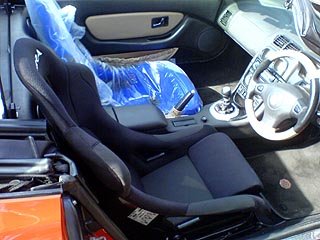 Shown right is the same seat, taken from a different
angle. Although the seat shown has a side-mounted bracket fitted, the seat is
not actually bolted into the car. Remember that Cobra do not retail a specific
seat mounting kit for the MGF.
Dropped into the seat-well like this, the seat was extremely comfortable, and a good fit with a reasonable driving position. For some of us with larger posteriors, it was a bit tight on the cheeks, so if you are planning to buy bucket seats, it is highly recommended that you try them out before purchase.
Having established that the Imola seat does indeed fit, we
wanted to see whether a seat with a wider base would also be suitable for
fitment in an MGF.
Cobra Monaco
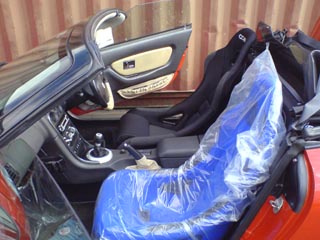
 The
other seat that we trialled was the Cobra Monaco. Apologies for not having
removed the plastic cover, but this was a customer seat, and Cobra did not want
us getting it dirty. Fair enough.
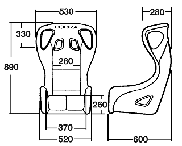
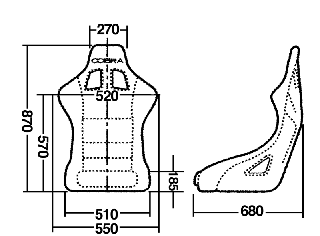
Dimensionally, it is very similar to the Imola (diagram opposite, right), but with a few extra millimetres in base width.
Okay, yes, it's bright blue - but Cobra do a range of standard colours, and if your pockets are deep enough will cover it in leather in what ever colour you fancy. It has a broader seat base and for the bigger boned of us, was more comfortable than the Imola chair.
In fact, the Monaco would probably be my choice of FIA seat for our MGs.
Seat mounting
 Seat
mounting is the genuine headache. If there were an off-the-shelf seat mounting
solution, then I am confident that many more MGFs and TFs would have been fitted
with after market seats by now! When we visited Cobra, our plan had been to see
whether we could mount a Cobra seat onto the standard MGF seat runner and
subframe.
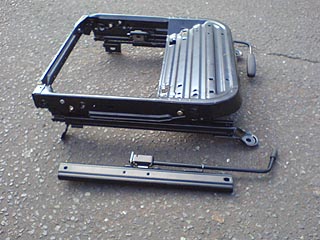
Pictured right is the standard MGF seat runner and subframe - and this is identical to what you also find in the later TF. The front of the frame is to the right of the picture, and you can see the adjuster sprouting from the top right corner. The front of the subframe has a corrugated sheet sheet - this is to prevent 'submarining' under extreme deceleration as you find in crash conditions. Original Equipment Manufacturers have to go to this extremes to ensure vehicle homologation, and your safety. Aftermarket seat manufacturers however don't - although if FIA approved, will have to go through entirely different testing procedures.
So, you'd think that mounting an FIA approved chair on a homologated seat subframe would be a good idea? We did. But the problem is that when you place a seat on top of this structure, you sit even higher than you do on a standard seat! To get an aftermarket seat to fit low on this subframe would require very extensive surgery and fabrication - and of course, you'd loose the advantage of convenience. Might as well start from scratch.
 In
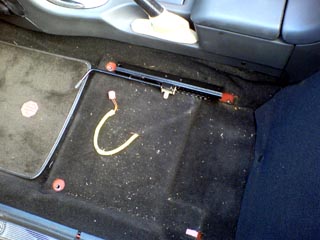
the foreground of this picture you can see a Cobra universal seat runner (one
half of a pair). Quite a lot smaller as you can see! So we put it in the cockpit
of the MGF we were using. The cut outs in the carpet with the red paint work
showing though is where the standard seat subframes bolt (x4) into specifically
strengthened areas of bodywork.
The Cobra universal seat runner doesn't come close to aligning with the standard mounting positions - and besides, they're surprisingly expensive for what they are.
We left Cobra somewhat edified, but with the not inconsiderable headache of needing to work out how to fit these seats in a car - and because these were road cars, they'd need seat runners rather than perhaps more straightforward fixed seat brackets.
Unfortunately this whole process came to a halt... but
then came along Project Shed!
Project Shed: mounting Cobra Clubman seats
 Project Shed, as you can read about
elsewhere, is being
built as a dedicated track car - to compete in the MGCC Sprint series, as well
as go on a few track days. Part of the design concept is to shed as much weight
as possible, and since the standard seats weigh an absolute ton, these were
destined for the surplus parts heap. This is also a budget build, so I had to
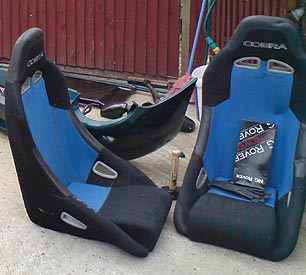
find some seats I could actually afford, and so when a pair of Cobra Clubmans
turned up on ebay for 30 quid (complete with tears and ciggie burns), I snapped
them up. I don't mind spending 30 quid on a speculative venture, but spending
nearly a grand on new seats that I am unsure will fit, that's another matter.
Of course, these seats have given me the same headache as I originally had when I visited Cobra all those years ago. Yes, fortunately, they are very compact (in fact, these had been removed from a Mini if memory serves me correctly), but they haven't come with any form of seat mounting furniture.
These seats are base mounted - four bolts into an integrated base subframe of the seat - into which I am using M8 (high tensile) cap bolts. As I do not really need for them to be adjustable, I could mount them rigidly (which is actually the FIA-approved way of mounting seats) - which would simplify the mounting brackets, save weight, and save height too.
I wanted to avoid welding if possible: welded joints are inevitably a point of weakness, so if the mounting bracket were one continuous piece of metal, it could well prove more reliable and stronger. It could also prove cheaper given the reduction of man hours required to manufacture it. The bracket also needed to be able to comply with race regulations - and having read the relevant section in the MSA rule book, 3mm thick mild steel was the material of choice. With this in mind, plans for the mounting brackets have developed over a period of time - and a number of design variations - and you can read more about this here: http://www.mgfregister.org/forum/viewtopic.php?f=8&t=8361&sid=ac00fe7690c3da399bcbd785932eb58d
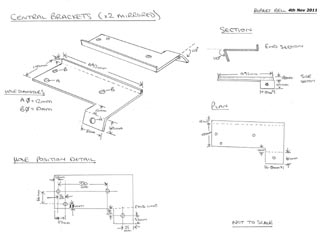
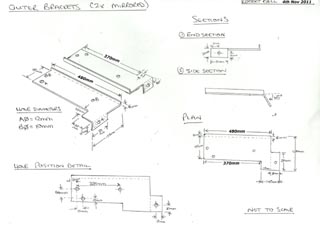
Ultimately, this is the design that I've finally alighted upon:
 |
 |
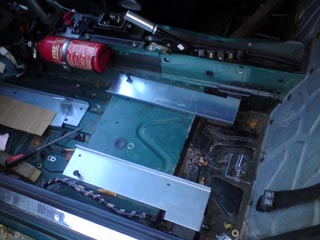 |
Above left: Inner most "central" brackets. Above right: Outermost "outer" brackets. Left: brackets trial fitted into Project Shed for first time - a good fit! |
You can download a pdf version of these drawings here:
![]()
|
JEFFARK Engineering
& metal pressing Ltd. Tel: 01494 471454 |
As you can see, these are basic steel plates onto which you can directly bolt the seats. But if you can bolt seats to them, then you could also bolt seat runners to them too - and in this case, you could then mount which ever seats you fancy. Initially I had intended to use counter sunk bolts, but in the end I've used cap bolts - and additional holes have to be drilled into that box section for these, but this is not an excessive amount of work. Given their simplicity, they are not specific to one type of seat; I see them as an investment that can be used with any replacement seats that I may choose to use - included fully FIA approved items such as the Evolutions used on the original Cup Cars.
These brackets were very kindly fabricated by Dave Hollis of Jeffark Engineering in High Wycombe (details in box opposite) - and I am sure he'd be very happy to fabricate more of these brackets should you wish them. Alternatively, take my designs to your preferred sheet metal engineering company.
As you'll notice from the photograph above, I have designed the brackets for Project Shed, which does not have interior carpets. However I don't think that this should be too much of a problem if you were planning to use the brackets with a car with carpets, as they are pretty thin, and could be cut to accomodate the bracket mountings if necessary.
If you do fit these brackets to your car, please do let me know how you get on - I'd be very interested to hear about your experiences!
My next challenge is to work out how to fit inertia reel seat belts, beloved of the MoT man - so watch this space!