|
Words and Pictures: Gareth Hampson |
|
|
Interior Trim: TF pods
onto Mk1 MGF door cards
|
One of the commonest modifications to early MGFs is a spruce up with more modern MGF MY2000 or TF components. As all these parts are readily transferable, the job is something that anyone can do in an afternoon. That includes me! However, what isn't often appreciated is that you don't have to throw away your old Mk1 door cards. Why not? Because you can use late MGF or TF trim pods on the existing door card, as Gareth Hampson found out. What this means is that you can buy the trim pods (the section of soft trim that surrounds the interior door handle) without having to go to the expense of having to buy the whole door trim. In Gareth's case, his hand was somewhat forced, as he explains below:
![]() As promised, some
pictures of the work in progress. As I
said in my original thread, the reason I couldn't use the TF cards I had was due
to them being quite badly damaged. I have also now changed the speaker covers
and fitted the tweeters, but left the F ones in place for the photo to show it
was the same card.
As promised, some
pictures of the work in progress. As I
said in my original thread, the reason I couldn't use the TF cards I had was due
to them being quite badly damaged. I have also now changed the speaker covers
and fitted the tweeters, but left the F ones in place for the photo to show it
was the same card.
I've assumed most peeps will know the way the pods
actually attach to the cards so didn't take any pictures of the clips and pins.![]()
A brief description of the photos :-
|
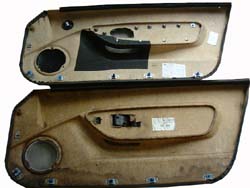
1. |
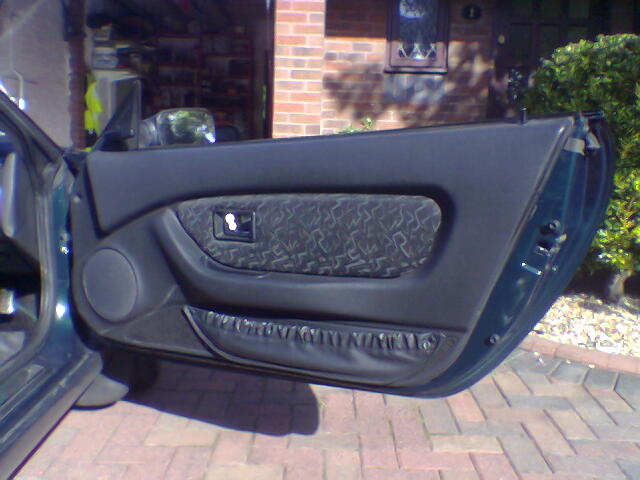 What the door card looked like
before work started: a standard Mk1 door card with a cloth insert. What the door card looked like
before work started: a standard Mk1 door card with a cloth insert. |
|
2. |
 The first task is to
remove the interior door trim (the door card) from the door (this is covered
in more detail here). Now
remove any staples from back of card
around the door pull opening, pinch a corner of the trim and pull. Most of the
foam backing came away with trim the small amount that was left I sanded off
will some fairly rough sandpaper. The first task is to
remove the interior door trim (the door card) from the door (this is covered
in more detail here). Now
remove any staples from back of card
around the door pull opening, pinch a corner of the trim and pull. Most of the
foam backing came away with trim the small amount that was left I sanded off
will some fairly rough sandpaper. |
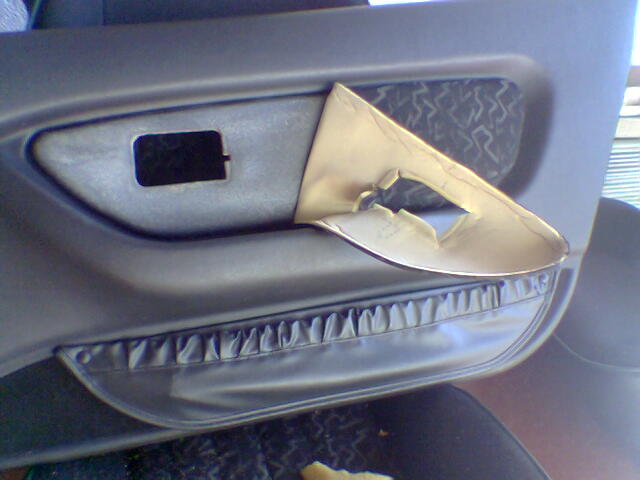
| 3. |
 The next step is
to slightly modify the profile of the existing door card 'pod' in order to allow the plastic top trim to seat
correctly. Therefore it is necessary to "relax" or re-profile the front and rear
upper corners of the pod
moulding on the door card. I used brute force and a flat bladed screwdriver, if
you had a "dremmel" and a circular cutting bit full removal of the corners would
be ideal. The next step is
to slightly modify the profile of the existing door card 'pod' in order to allow the plastic top trim to seat
correctly. Therefore it is necessary to "relax" or re-profile the front and rear
upper corners of the pod
moulding on the door card. I used brute force and a flat bladed screwdriver, if
you had a "dremmel" and a circular cutting bit full removal of the corners would
be ideal. |
| 4. |
 The
next step is to get all the fastening locations drilled so that they are in
the right place for attaching them to the original door cards. I fastened
r/h TF card back to back with the l/h F card with parcel tape to provide
positive location, as shown opposite. If you do not have the 'donor' TF door
cards, then see note below. The
next step is to get all the fastening locations drilled so that they are in
the right place for attaching them to the original door cards. I fastened
r/h TF card back to back with the l/h F card with parcel tape to provide
positive location, as shown opposite. If you do not have the 'donor' TF door
cards, then see note below. |
| 5. |
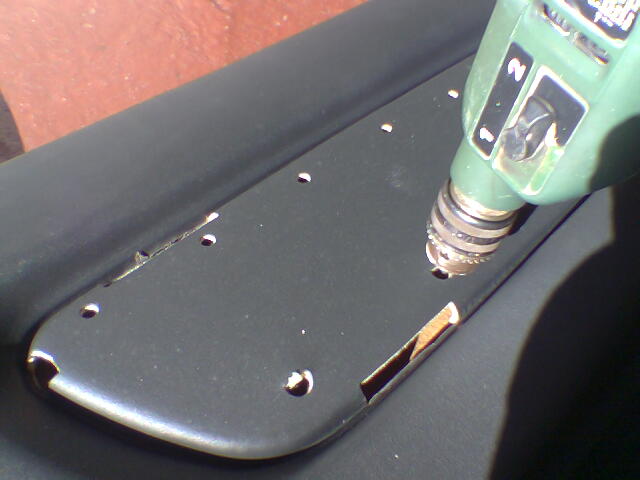 Once satisfied that both
door cards are correctly aligned with one another, the scary bit: drilling! Drill through TF card holes into
and through the F card.
Separate the cards and elongate holes horizontally, to allow metal clips of
lower pod to pass through. You can see the method of attachment a little more
clearly
here. Once satisfied that both
door cards are correctly aligned with one another, the scary bit: drilling! Drill through TF card holes into
and through the F card.
Separate the cards and elongate holes horizontally, to allow metal clips of
lower pod to pass through. You can see the method of attachment a little more
clearly
here. |
| 6. |
 The next set of drilling
requires the lower trim pod to be fitted into place. Locate lower pod onto the card and bend over
clips to locate. Drill through the holes in the top edge of the lower pod
section. The next set of drilling
requires the lower trim pod to be fitted into place. Locate lower pod onto the card and bend over
clips to locate. Drill through the holes in the top edge of the lower pod
section. |
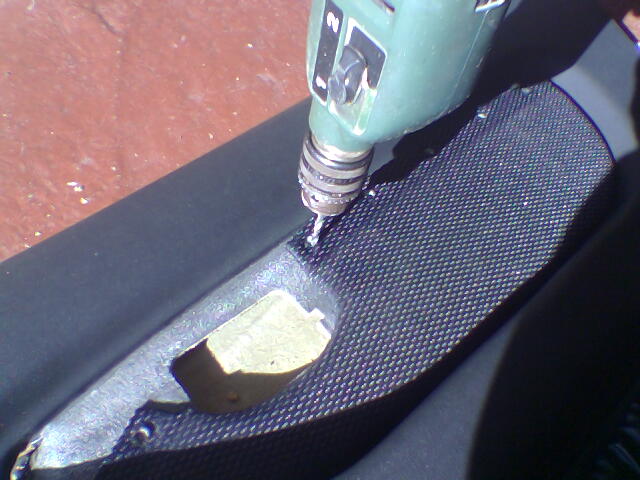
| 7. |
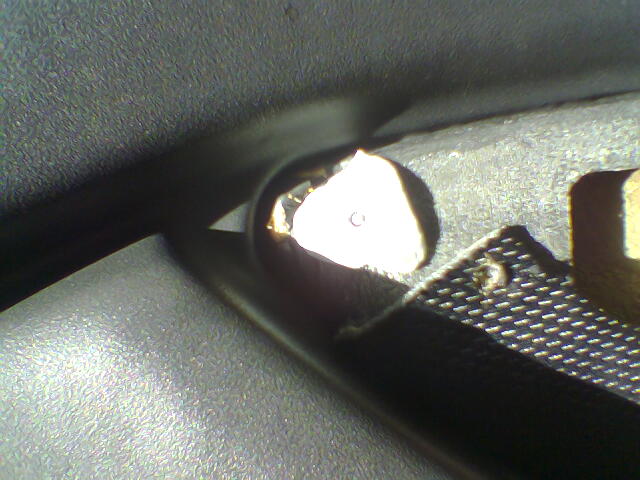 There is one plastic pin on the upper trim
that does not pass through the pod's lower soft-trim section, which means that
there is no readily available guide for drilling. To get around this
problem, I squashed a blob of bluetac onto
the area I imagined the pin would sit and using the other holes to locate the
top trim pushed the pin into the bluetac to provide a tell-tale of its location.
Using the indented bluetac as a guide, drill through. There is one plastic pin on the upper trim
that does not pass through the pod's lower soft-trim section, which means that
there is no readily available guide for drilling. To get around this
problem, I squashed a blob of bluetac onto
the area I imagined the pin would sit and using the other holes to locate the
top trim pushed the pin into the bluetac to provide a tell-tale of its location.
Using the indented bluetac as a guide, drill through. |
| 8. |
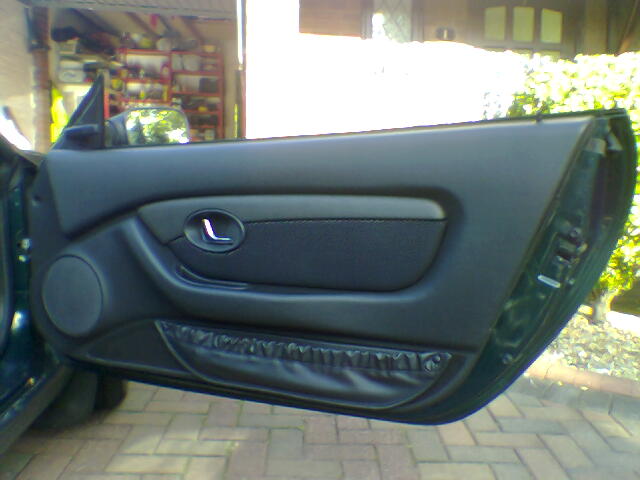 At last, finished! This is
the original door card, now fitted with the TF hard and soft pod trim, which
looks absolutely stunning. What picture doesn't show is Gareth's beaming smile! At last, finished! This is
the original door card, now fitted with the TF hard and soft pod trim, which
looks absolutely stunning. What picture doesn't show is Gareth's beaming smile!
|
| NB | If you don't have a TF
(or MY2000 MGF) door card, don't despair... If you don't have a pair of TF cards to use as a template, then omit steps 4, & 5, and instead fold back or remove entirely the metal clips on the lower pod section. Then, using either industrial grade double sided tape or a contact adhesive bond the lower pod section to the door card. It locates in the "gutter" section into which edges the original F door pod trim are hidden, so correct location is all but guaranteed. |