| Installing rear T-bar speakers to a pre- MY2000 MGF (or MGTF 115) |
I confess. I really was not sure of the advantages of fitting speakers into the T-bar. But since I’ve fitted them, I couldn’t go back- the improvement in sound - especially with the roof down - is fantastic. It is amazing that you can still hear the music, roof down, at 100 mph on the autobahn! Kewl. There are certain pit falls to avoid with an installation such as this. Most important among them is that for good stereo effect, the high pitched sounds need to be filtered out from the rear speakers. My current set up has not currently got this modification (you need a cross over), so as a consequence, with the hard top on, the stereo ‘image’ is not as good as it should be. However, roof down this is no problem (possibly even an advantage!) - so go ahead, fit speakers in the T-bar- you’ll never look back!
The following instructions are for front-mounting the speakers to the T-bar. A couple of advantages for doing this: ease of installation and increased depth behind the speaker. The disadvantages comes when trying to over come the curvature of the trim - but Tom Randell has a solution that is featured at the bottom of this page.
Tools required:
Electric drill
Jig saw
Stereo releasing tool
screw drivers
Other materials:
A four speaker harness for the stereo (available from Halfords etc.) with a male and female connector at each end
4 meters of automotive speaker cable
chocolate-block electrical connectors or similar
speakers for T-bar, not to exceed 12” in height
Time required:
Budget a full afternoon for this one!
| 1. |
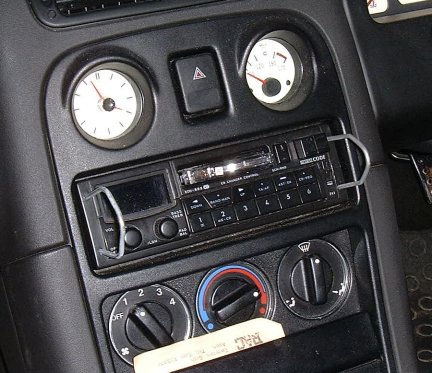
Remove stereo from the centre console with the appropriate tool. |
|
| 2. | Unplug the standard stereo speaker harness. It only has connections for the front two speakers. Plug in the new speaker harness, which will have the wiring for four speakers. Cut the wires for the rear two speakers. Plug the standard harness into the female plug of the harness adapter. The rear speakers wires, bear the tips, and put into the chocolate block connector. |
|
| 3. | Attach two lengths of speaker cable to the chocolate block, and run the wire inside the centre trim tunnel of the cockpit. |
|
| 4. | Remove the T-bar as previously described. Also loosen of the vertical cubby box (undo the hinge screws holding the centre cubby hinges) so that the wire can be run up behind the trim. |
|
| 5. | Attach a chocolate block connector to the ends of these wires, and fix in place behind the alarm ultrasonic sensor. |
|
| 6. |
With the T-bar now free, mark out the location for the speakers. Most speakers come with templates to aid with this. Next comes the single problem: the T-bar is a curved surface, and speakers are designed to mount on a flat plane. Various solutions can be tried, from hollowing out the T-bar foam under the surface of the T-bar cover, to making up an adapter plate. Give this some thought, although a finial solution can wait for another day (I still haven’t figured this out, and anyway, I’ll probably end up fitting different rear speakers anyway!!!) See below for Tom's solution. |
|
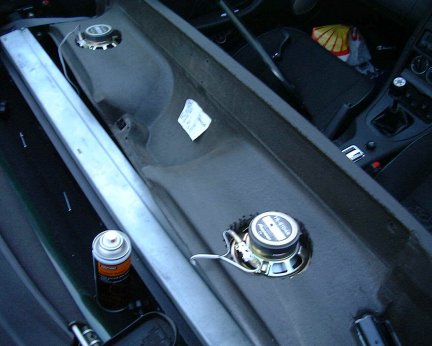
| 7. |
Install the speaker into the T-bar. If the speakers are to be fitted with self tapping screws, the T-bar material is sufficiently robust to allow this form of fastener. |
|
| 8. |
Connect the speakers with the supplied speaker cable, and run the other end to the chocolate block connector.
|
|
| 9. | Make sure that the stereo is connected up, and switch on before putting everything back into place- make it easy to fault find! Check the function of both rear speakers. | |
| 10. | Finally reassemble and go for a test drive. Rear speakers- you’ll love em! |
Tom Randell's solution for the gap between speaker grille and T-bar:
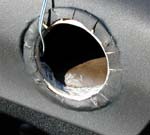
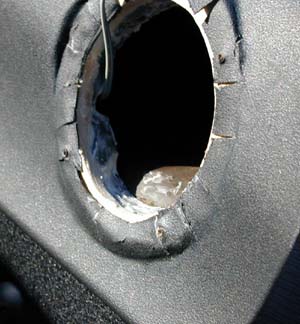
| Tom has, I think, been very clever with
this installation. To avoid the unslightly gap what Tom has done here is to carve out some
of the underlying compressed foam that makes up the structure of the T-bar trim, and
inserted an MDF mounting ring that is, of course, flat. You can see this mounting ring in
the picture opposite right, and in the image below.
To finish the job off, the vinyl surface has been stretched to cover the MDF mounting ring.
|
 |
|
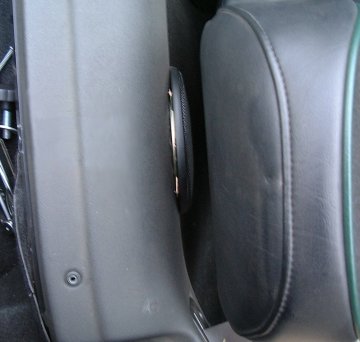
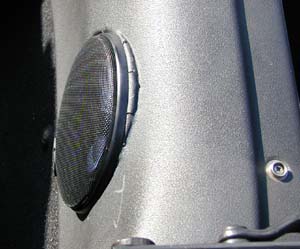
| Opposite, right, is the speaker now flush
mounted to the covered MDF mounting ring. A much neater solution to the one I've used I am
sure you can agree. I hope that Tom doesn't mind me pointing out the single weakness in his solution: the need to cut the vinyl into tabs in order to get the adapter ring behind the vinyl covering. The solution to this may be the make the mounting ring in more than 2 parts, such that the two halves of the ring can be tucked behind the ring without having to make cuts in the trim. When I come to replace my 10cm Pioneer speakers with something a little more potent, I think that this is the method I'll try to adapt to finish the job off nicely. |
 |