
|
|
MG X-Power Speedster Roll Hoops - Installation |
There seems to be an ever increasing choice on the market for "roll hoops" suitable for installation on the MGF/TF - and most appear to be modelled on the Audi TT design. It is important to note that none of the hoops currently available have been subjected to dynamic crash testing, and none are FIA approved for motorsport. But the hoops available from Mike Satur, Safety Devices and X-Power (MG Sport and Racing) are all sturdy designs that ought to provide additional protection to occupants should the worst happen. Indeed, the X-Power 'Speedster' hoops have been subjected to 'crush testing' at MIRA to prove its worth, and Mike Satur customers are able to provide excellent testimonials as to Mike's hoops in the event of an inversion.
So you are interested in installing some roll hoops to your car - and you want to know what is involved? Here, I've covered the installation of the X-Power roll hoops to my car.
What the kit contains
The X-Power kit contains full fitting instructions (that are easy to follow), two brackets, the hoop assembly and all required nuts and bolts.
 |
|
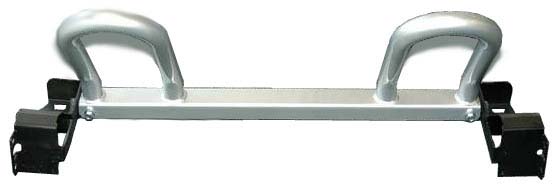
| The complete roll hoop kit - assembled off the car, showing the mounting brackets (black) and the roll hoop assembly itself, which is a usefully substantial bit of kit. | |
 |
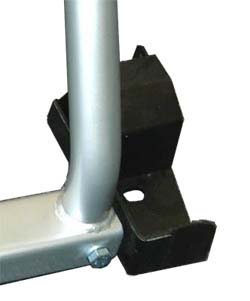 |
| Close up of RH bracket | RH bracket from another angle |
What else you will need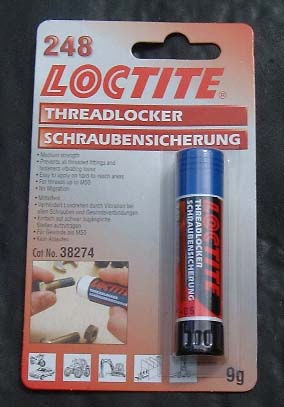
Instructions
| 1. | The first job is to release the rear bulkhead T-bar trim and remove the hood frame from the car - the reason for doing this is that the brackets for the hoops use the same mountings as the hood - and the T-bar subframe bar needs removing. This procedure is covered here. |
| 2. |
 Now remove the parcel
shelf carpet and sound deadening material. Now remove the parcel
shelf carpet and sound deadening material. |
| 3. |
 Remove the
T-bar subframe (this holds the rear speakers on TF and MY2000 model MGFs).
This is held in place by four 8mm M6 bolts. Remove the
T-bar subframe (this holds the rear speakers on TF and MY2000 model MGFs).
This is held in place by four 8mm M6 bolts. |
| 4. |
 Now remove the two seat
belt reels from their mountings on the parcel shelf. Be careful not to twist
the webbing. Notice too that the reel will lock if not in the same
orientation as it was when actually in the car. Now remove the two seat
belt reels from their mountings on the parcel shelf. Be careful not to twist
the webbing. Notice too that the reel will lock if not in the same
orientation as it was when actually in the car. |
| 5. |
  Position
the hoop mounting brackets Position
the hoop mounting brackets |
| 6. |
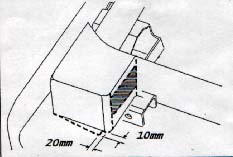
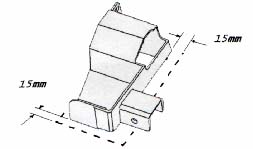 Now the
craft-knife bit. The sound deadening material needs to be trimmed to give
approximately 15mm of clearance around the hoop bracket - as shown in the
diagram, right. It is probably easier to do this out of the car, but I left
everything in situ, and hacked away... Just remember to be careful with that
sharp knife and vulnerable fingers!!! Now the
craft-knife bit. The sound deadening material needs to be trimmed to give
approximately 15mm of clearance around the hoop bracket - as shown in the
diagram, right. It is probably easier to do this out of the car, but I left
everything in situ, and hacked away... Just remember to be careful with that
sharp knife and vulnerable fingers!!! |
| 7. |
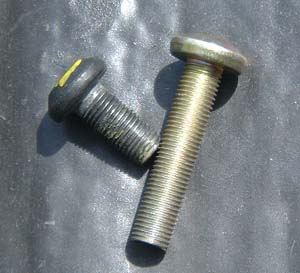 Now we can start to
reassemble the parts we've removed earlier. Note that you have to use the
supplied, new, torx-50 bolts supplied with the kit - compared with the old
ones you've removed, they are a fair bit longer... Now we can start to
reassemble the parts we've removed earlier. Note that you have to use the
supplied, new, torx-50 bolts supplied with the kit - compared with the old
ones you've removed, they are a fair bit longer... |
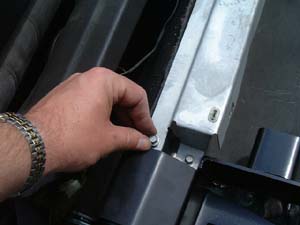
| 8. |
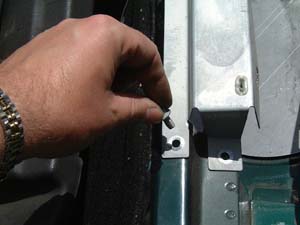
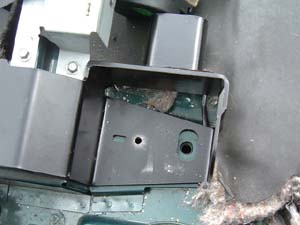 If your car is a
very early MGF, as mine is, you'll find that the position locator stud on
the under-side of the inertia reel belt is located in a different place to
that found on the reels fitted to later cars. There is only one solution:
drill a new 6.5mm hole for the locator stud - shown here on the right. Those
of you with later F's ('97 onward?) should have no problems, so you can
conveniently skip this step! If your car is a
very early MGF, as mine is, you'll find that the position locator stud on
the under-side of the inertia reel belt is located in a different place to
that found on the reels fitted to later cars. There is only one solution:
drill a new 6.5mm hole for the locator stud - shown here on the right. Those
of you with later F's ('97 onward?) should have no problems, so you can
conveniently skip this step! |
| 9. |
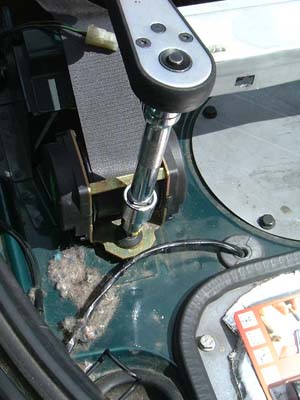
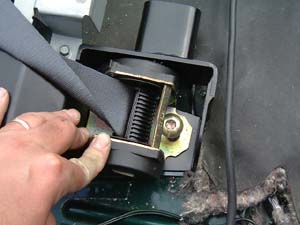 Now you can replace
the removed inertia reel. Two hints here: firstly, make sure that the belt
webbing hasn't inadvertently twisted - if it has, unwind the twist otherwise
you'll have all sorts of problems with the belt later. Second, it is worth
unwinding the belt as far as it will go to provide clearance around the
torx-50 bit (mine's on a 1/2 inch drive, so is rather bulky) - as pictured
opposite. Now you can replace
the removed inertia reel. Two hints here: firstly, make sure that the belt
webbing hasn't inadvertently twisted - if it has, unwind the twist otherwise
you'll have all sorts of problems with the belt later. Second, it is worth
unwinding the belt as far as it will go to provide clearance around the
torx-50 bit (mine's on a 1/2 inch drive, so is rather bulky) - as pictured
opposite.Remember to use some Loctite on the bolts, and torque up the bolts to 35Nm. |
| 10. |
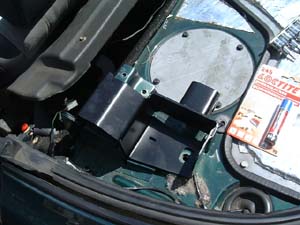
 Now refit the
T-bar subframe bar. Now refit the
T-bar subframe bar. |
| 11. |
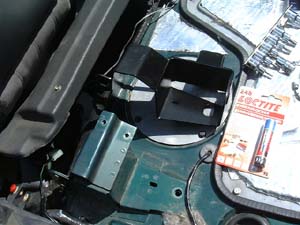
 The parcel shelf carpet
now needs to be trimmed in the manner shown opposite (removed the shaded
area), to provide clearance for the 'bar to be installed. The parcel shelf carpet
now needs to be trimmed in the manner shown opposite (removed the shaded
area), to provide clearance for the 'bar to be installed. |
| 12. |
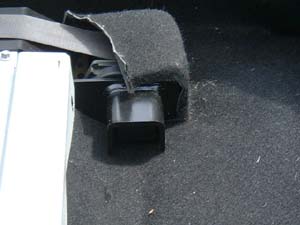 Refit carpet trim,
tucking the carpet between the bracket and parcel shelf. Refit carpet trim,
tucking the carpet between the bracket and parcel shelf. |
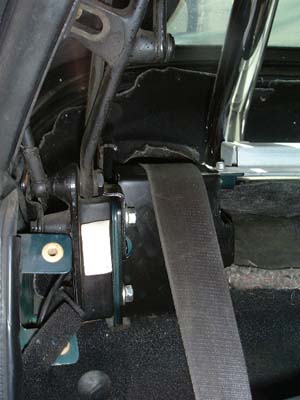
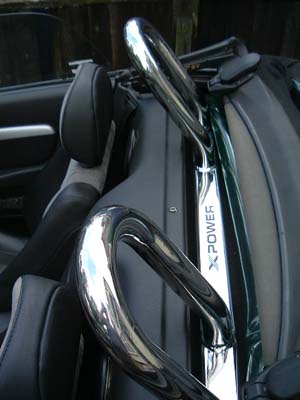
| 13. |
 The Speedster hoops
can now be assembled - this uses two 19mm-head M12 bolts with flange nuts.
Torque these up to 75Nm. The Speedster hoops
can now be assembled - this uses two 19mm-head M12 bolts with flange nuts.
Torque these up to 75Nm. |
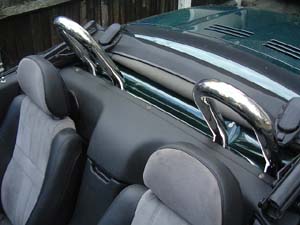
| 14. |
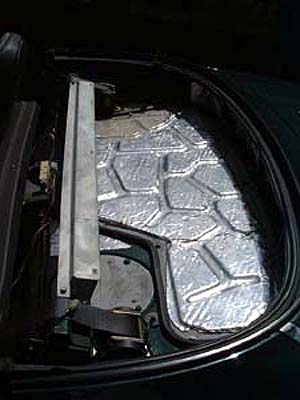
 Now the
hood can be refitted. Note how the hood retaining bolts now clamp the front
of the roll hoop brackets into position. A very neat solution. Now the
hood can be refitted. Note how the hood retaining bolts now clamp the front
of the roll hoop brackets into position. A very neat solution. |
| 15. |
 Replace the
T-bar, and the job is done! Just perform a quick check to ensure that the
seat belts function properly before storing all your tools!! Now all that
remains is to apply that prestigious X-Power sticker. Cool. Replace the
T-bar, and the job is done! Just perform a quick check to ensure that the
seat belts function properly before storing all your tools!! Now all that
remains is to apply that prestigious X-Power sticker. Cool.
|
 The
single greatest advantage of the X-Power 'Speedster' Safety Roll Hoops is not
the excessively long title, but rather the ease of installation, and the lack of
trim modification required. Certainly, the Safety Devices hoops necessitate
extensive modification to the T-bar - as indeed does those supplied by Mike
Satur. The disadvantage shared with the Safety Devices roll hoops, is that the
hoops have to be removed in order to gain access to the engine compartment.
However, since this is only held in place by two bolts, this ought not be too
much of a chore.
The
single greatest advantage of the X-Power 'Speedster' Safety Roll Hoops is not
the excessively long title, but rather the ease of installation, and the lack of
trim modification required. Certainly, the Safety Devices hoops necessitate
extensive modification to the T-bar - as indeed does those supplied by Mike
Satur. The disadvantage shared with the Safety Devices roll hoops, is that the
hoops have to be removed in order to gain access to the engine compartment.
However, since this is only held in place by two bolts, this ought not be too
much of a chore.