How to repair an MGF / TF mesh wind stop
|
Words and pictures:Steve Hainsie www.swmgf.org.uk |
|
|
How to repair an MGF / TF mesh wind stop
|
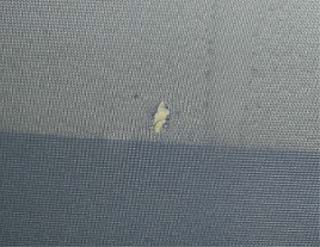
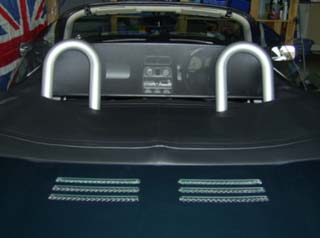
 Quite a common problem for MGF/ TF owners is the hole or
ladder in the mesh of the wind stop. The question is what can I do about it?
Quite a common problem for MGF/ TF owners is the hole or
ladder in the mesh of the wind stop. The question is what can I do about it?
I could buy a new wind stop – possibly £100
I could darn it like a pair of tights – it’ll look worse, trust me!
I could replace the mesh fabric – but how to do it ? am I capable ? and where do I get replacement fabric? This’ll be nearly as expensive as the new wind stop, surely?
Fortunately, I have been through the pain of trawling round many a fabric shop enquiring as to suitable stiff fishnet type material and have found the perfect stuff readily available at no risk of embarrassment to male purchasers.
1. |
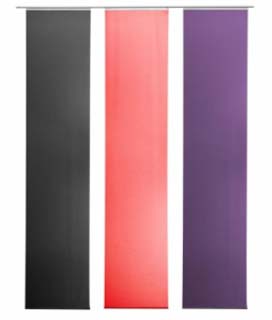 First things
first, go to Ikea and buy yourself a roll of "Flynn Lill" panel curtain in assorted colours
http://www.ikea.com/gb/en/catalog/products/40141668. First things
first, go to Ikea and buy yourself a roll of "Flynn Lill" panel curtain in assorted colours
http://www.ikea.com/gb/en/catalog/products/40141668.You'll find it in the curtains and blinds section on a roll that's about 3m long by 60cm wide and its £1.36 per roll - bargain!! If you go in the morning, breakfast is worth trying out too. [Oooh look, there are other colours available - so plenty of opportunity for personalisation of your windstop by the looks of things - Ed] |
| 2. |
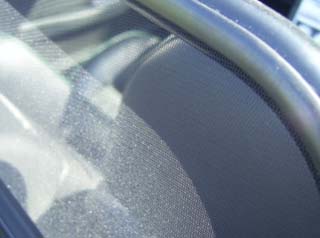
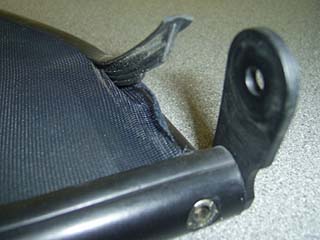  After your
exciting foray to Ikea and hoping that you didn’t buy too many extra things
to occupy your time assembling, you need to take apart the wind stop. After your
exciting foray to Ikea and hoping that you didn’t buy too many extra things
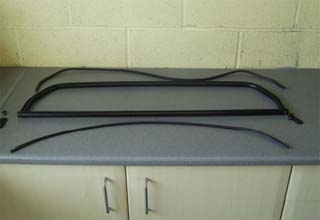
to occupy your time assembling, you need to take apart the wind stop.The mesh is held in by two rubber strips that push it into a recess around the top and base of the tubular wind stop (as in the left hand photo). Gently remove the rubbers and set aside. |
| 3. |
|
| 4. |
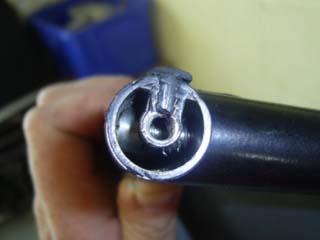
 You should have a
table of bits that now look something like this: You should have a
table of bits that now look something like this: |
| 5. | Now cut your new fabric roughly an inch or so larger that the old fabric you’ve removed |
| 6. |
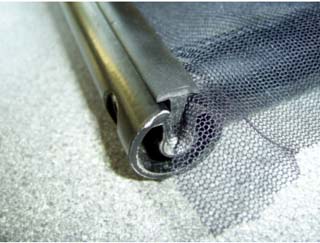  Place the fabric
over the frame loosely, with the bottom edge about 5mm over the bottom
groove of the frame. Push the bottom rubber in, making sure there are no
folds in the mesh fabric. Place the fabric
over the frame loosely, with the bottom edge about 5mm over the bottom
groove of the frame. Push the bottom rubber in, making sure there are no
folds in the mesh fabric. |
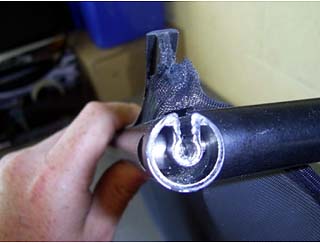
| 7. | When you have put the bottom rubber into the recess and given it a sound tap (a rubber mallet was useful here) start from one side of the frame and stretch the fabric whilst inserting the rubber over it and into the groove. Don’t worry if you do a bit and it looks ruffled, just go back and try again. |
| 8. |
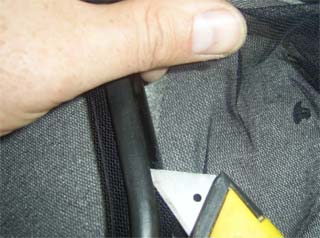 Cut off any
excess mesh sticking out from the rubbers, I also had to trim the rubbers to
fit as they had stretched a bit on removal. Cut off any
excess mesh sticking out from the rubbers, I also had to trim the rubbers to
fit as they had stretched a bit on removal. |
| 9. |
  Refit the wind
stop brackets and the wind stop to the car and job done! Refit the wind
stop brackets and the wind stop to the car and job done! |
| 10. | Go out for a spin
and if you have any hair (unlike me) it shouldn’t blow around as much as it
did with that hole in it! Some say that this has been tested to 100mph. Not
bad for £1.36 and about an hour of your time (not including that spent in
Ikea of course!) |
Download PDF version of these instructions here:
![]()
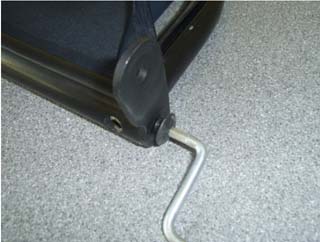 Next you need to remove the fixing brackets.