| Words and Pictures: Rob Bell |
|
|
Speedo
cable failure: DIY replacement
|
Background
There are two types of speedometer used in the MGF - the first is a mechanical, cable-driven instrument, the other, an electronic device. All Mk1 MGFs use the former, whereas Mk2/ MY2000 MGFs and all TFs use the latter. The electronic speedometer rarely gives trouble - and nor does the mechanical instrument in itself. However, the mechanical speedometer can suffer from the mechanical linkage to the gearbox: the needle can suffer 'twitchiness' where it wavers around a given speed, or worse, the cable can fail completely, leaving you with a completely dead speedometer. Worse still, because the electric power-assisted steering (EPAS) relies on a speed signal from the speedometer, loss of the speedometer leads to fail-safe failure of the power steering system itself.
If your car has a wavering speedometer needle, it is worth investigating the entire cable length to see whether the cable has to make any excessively sharp turns - and if a sharp turn is found, try and make that bend less acute.
In this page however, we're going to look into how to rectify a speedometer cable fault.
The MGF's cable is made up of three cables joined together (except extremely early cars, where the cable was in two parts). These are called upper, intermediate and lower respectively. The upper cable is the one that feeds into the back of the instrument itself, whereas the lower cable is the one that attaches to the gearbox output spindle. Predictably, the intermediate cable is the one in the middle, and is the longest of the three, running nearly the full length of the passenger cell to the engine compartment.
Of the three cables, the one that experience has revealed to be the weakest is the lower cable, the one that inserts into the gearbox speedo output. However, before ordering the replacement cable it is worth looking at the other two cables first. The upper cable is easy to inspect: the shroud cover needs to be removed, and the speedo cable identified (it runs through a rubber grommet in the bulkhead panel). Splitting the upper and intermediate cables, it is possible to safely withdraw the inner cable from the upper section: the inner cable can be inspected and replaced as need be. The intermediate cable is a little harder to inspect, but by jacking the left side of the vehicle up, and securely chocking it in position, it is possible to split the intermediate and lower cables whilst under the car. If the other end of the cable is then brought up towards the lower end of the cable, you can then check to see whether rotating one end of the cable leads to motion of the inner cable at the other.
If the upper and intermediate cables are found to be in good condition, then suspicion turns to the usual candidate: the lower cable. Here's how to replace it.
Tools required
Time required
Instructions:
|
1. |
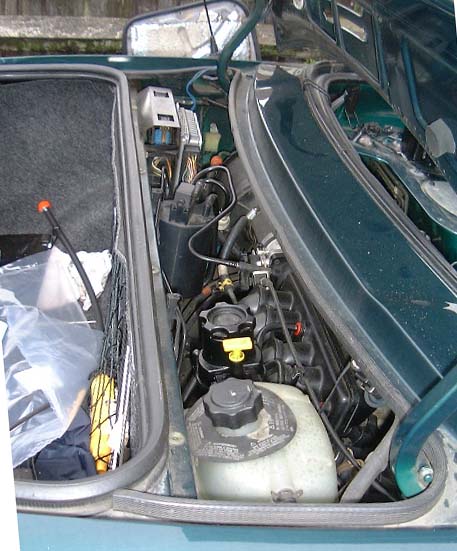 Open
the boot lid and remove the engine bay inspection grille. Also remove the
engine bay inspection panel from under the parcel shelf (as described
here) - although
the latter is not strictly necessary, it does aid the threading of the new
speedo cable through th eengine compartment. Open
the boot lid and remove the engine bay inspection grille. Also remove the
engine bay inspection panel from under the parcel shelf (as described
here) - although
the latter is not strictly necessary, it does aid the threading of the new
speedo cable through th eengine compartment. |
| 2. | Now jack up the rear of the car, and secure on axle stands. This will enable access to the intermediate/ lower cable connection. |
| 3. |
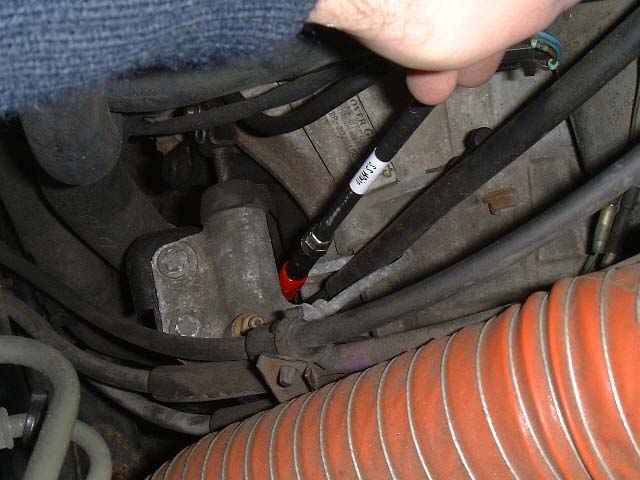
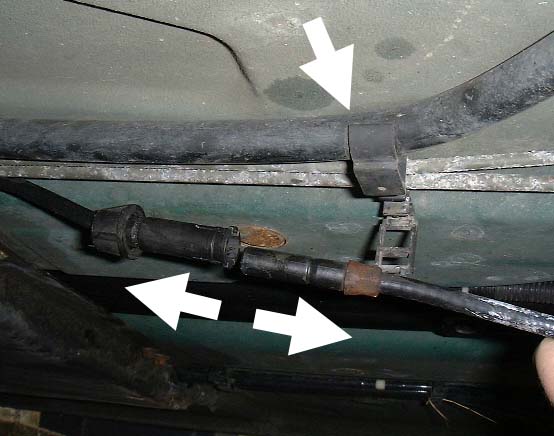 Now,
while under the car, identify the speedo cable run. It is on the left hand
side of your MGF, and the connector between the intermediate and lower cable
can be found near the rear wheel. The lower cable is retained in place by a
couple of black plastic retaining clips, that also hold the brake pipes in
place, and can be seen (arrowed) in the figure opposite. They can be readily
prised apart to release the cable with a flat tipped screw driver. Now,
while under the car, identify the speedo cable run. It is on the left hand
side of your MGF, and the connector between the intermediate and lower cable
can be found near the rear wheel. The lower cable is retained in place by a
couple of black plastic retaining clips, that also hold the brake pipes in
place, and can be seen (arrowed) in the figure opposite. They can be readily
prised apart to release the cable with a flat tipped screw driver.Once the cable is freed, withdraw the collar on the intermediate cable (pull towards front of car), and release the two cables from each other, as indicated in the picture opposite. |
| 4. |
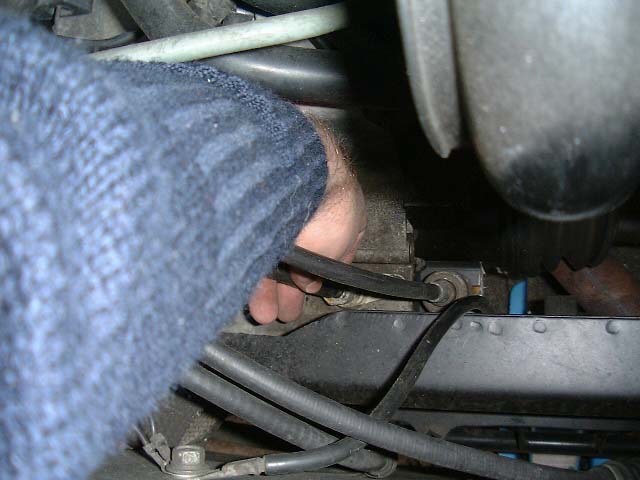 The
next step is to release the lower cable from the gearbox. The first step is
to identify the speedo cable. Follow it along its length. You can follow the
cable from the boot. The cable can be found just to the left of the engine
block - and indeed, in the picture opposite, you can just see the plastic
inlet manifold (top right of picture). The
next step is to release the lower cable from the gearbox. The first step is
to identify the speedo cable. Follow it along its length. You can follow the
cable from the boot. The cable can be found just to the left of the engine
block - and indeed, in the picture opposite, you can just see the plastic
inlet manifold (top right of picture). |
| 5. |
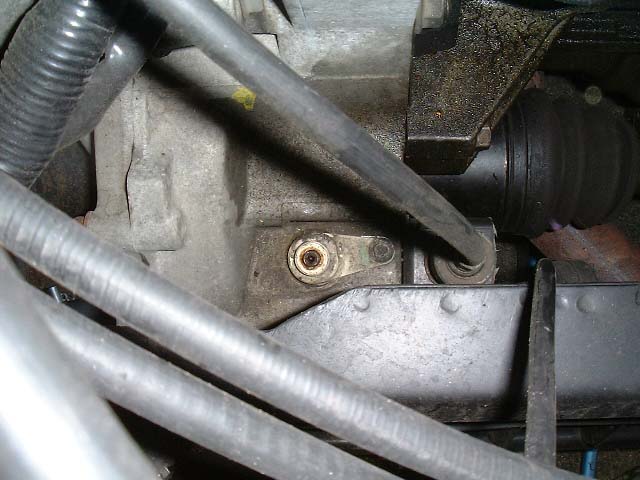
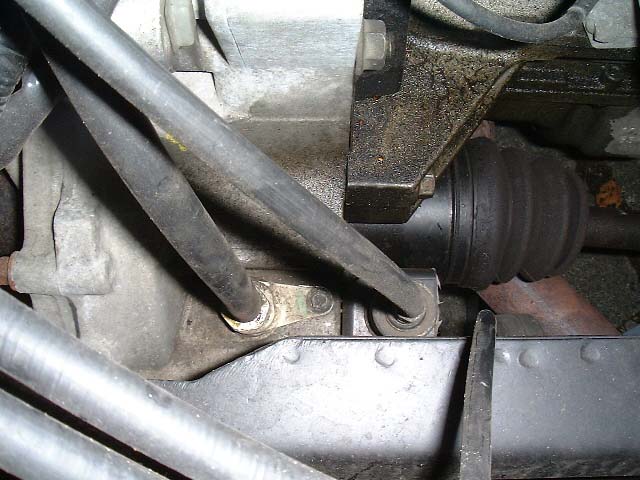 Now
follow the cable down to the gearbox. That's the speedo cable to the left.
Also note the rear crossmember of the rear subframe, and also the right
drive shaft to the right of the picture. Now
follow the cable down to the gearbox. That's the speedo cable to the left.
Also note the rear crossmember of the rear subframe, and also the right
drive shaft to the right of the picture.The retaining locknut at the end of the cable now needs to be removed. Depending on how tight this is will dictate how much of a challenge this job turns out to be!!! It should not be that tight... |
| 6. |
 Now
remove the old cable, exposing the gearbox speedo drive. Don't remove the
old cable completely at this stage - use it as a guide for the new cable. Now
remove the old cable, exposing the gearbox speedo drive. Don't remove the
old cable completely at this stage - use it as a guide for the new cable. |
| 7. |
 Attach
new lower cable to gearbox. Attach
new lower cable to gearbox. |
| 8. |
 Now
follow the old cable with the new one, as shown in picture, opposite. Now
follow the old cable with the new one, as shown in picture, opposite. |
| 9. |
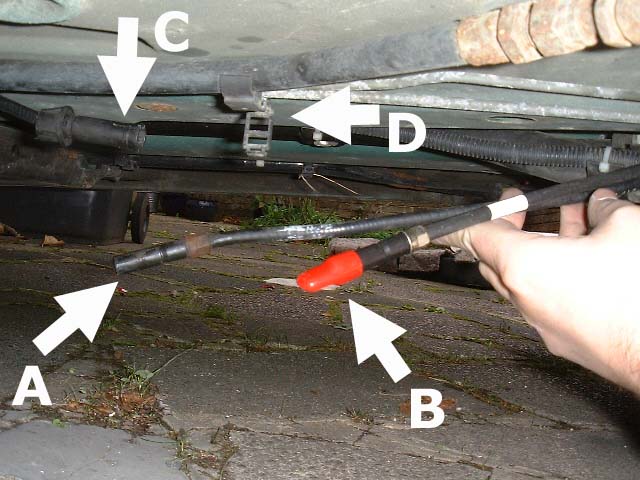 Now
bring new cable out so that you can connect it to the intermediate cable, as
shown opposite. A= old cable. B= new cable. C= intermediate cable connector.
D= lower cable retaining clip. Now
bring new cable out so that you can connect it to the intermediate cable, as
shown opposite. A= old cable. B= new cable. C= intermediate cable connector.
D= lower cable retaining clip.Connect new lower cable to the intermediate cable, and refasten the new cable in the lower cable retaining clips. Replace the engine inspection cover and the boot bay grille. You can now remove the old cable for closer investigation. |
| 10. |
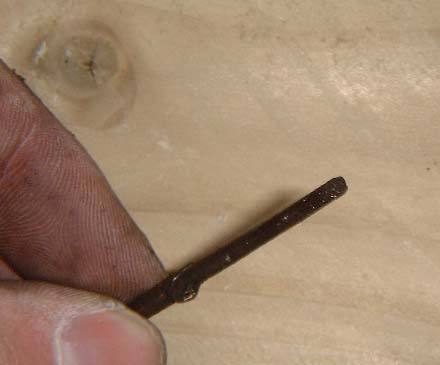
 After
withdrawing the inner cable from the lower section, it is clear why the
speedo had failed on my car. The cable had sheared clean in half. After
withdrawing the inner cable from the lower section, it is clear why the
speedo had failed on my car. The cable had sheared clean in half. |
Now you can drive you car happy that once again you have a functioning speedometer, and working power steering!!!
More Pictures of that broken cable for the morbidly interested:
|
|
 |
 |
| Picture shows end of cable: a clean break | A close up of the long remaining part of cable | A close up of the short section that joins the lower cable to the gearbox output drive |