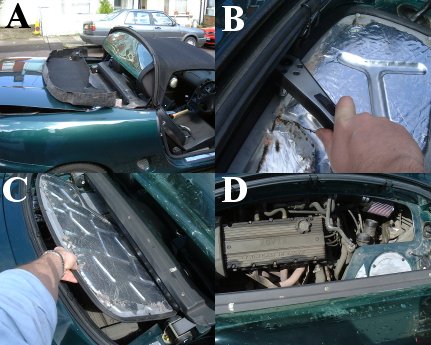
2. Remove the sound deadening material in a similar fashion.
3. Using 10 mm socket, remove all the fastening bolts on the engine bay cover. The cover pictured in B is more highly silvered than standard due to an additional layer of sound deadening material... That's another story!!!
4. After removing all the retaining bolts and putting them in a safe place, push the cover forward and lift the rear of the cover upward as pictured in C. To help with this, it is helpful to put the clasps away as can just be seen in figures C and D.
5. Remove cover to expose the engine- as seen in D!
Replacement really is a reversal of removal!
Cautional note: there is a thin metal trim under the edge of the T-bar- it is a little sharp and can cause a minor injury.