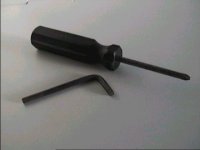
The only tools you need! |
What
you need!
The only tools and parts you need for the job
are a medium sized posidrive screwdriver, a 4mm allen key, and the Mk3 window
stop parts from your MG parts department. Here are the parts numbers for the Mk3
so you don't end up with the Mk1 and Mk2 (as my dealer tried to give me!).
SS105161
- Screw
CVT100090 - Washer
CUQ100140 - Window stop
Total cost (even
including VAT) was £2.41
|
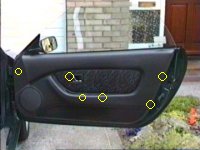
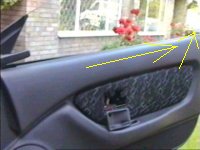
The
general positions of the five screws |
Step
1 - Locating the screws
There are five screws that need
to be undone before the door panel can be removed from your car. The position of
each of these is shown on the picture to the left.
The position of them
all also shown in more detail on the next five photographs.
Note: A
good place to keep these screws safe is the ashtray, far better than losing them
on the floor, seats etc. |
Starting with the easiest... |
This screw is located towards
the front of the car and is the most obvious. If you can't find this one, then
you may as well book your MGF into the dealers now ;-) |
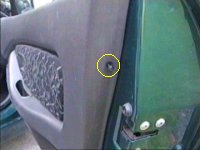
Top of the door width |
This one is slightly better
hidden as it's in the width of the door which you don't normally see. |
Bottom of the door width |
This one's at the bottom of the
door width so if you found the previous one, it's a doddle too! |
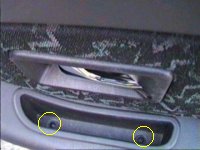
Two in the door closing "handle" |
Quite well hidden unless you
know they are there! I suppose you don't normally look in the "handle"
you use to shut the door. |
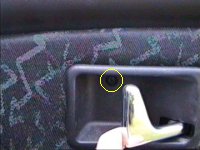
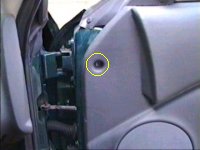
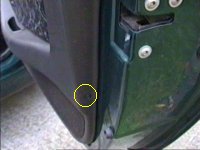
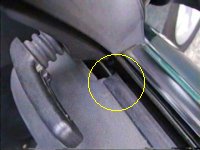
And the awkward one behind the door
opening handle |
This one is the best hidden yet
and most awkward to remove, it's still fairly easy though. Just pull the handle
to get access to the (smaller) screw that's hidden behind it. |
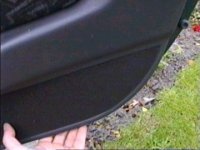
Pull until the clips are free |
Step
2 - Unclipping the clips!
There are a few (5?) clips
that hold the bottom of the door panel to the door itself. These require a bit
of force to remove but not too much or you may break them.
The easiest
way I've found to pull them free is to grab the back, bottom corner of the door
panel and give it a quick tug. This should free the first clip. Then repeat the
exercise all the way along the bottom of the panel until all the clips are free. |
Lift the panel backwards and upwards
slightly |
Step
3 - Removing the panel
Once all the screws are removed
and the clips that hold the bottom of the panel in place are free, you're ready
to remove the door panel. At this stage the panel is "resting" over
the top edge of the door.
To remove the panel, simply lift it backwards
and upwards slightly to free the front, top corner from underneath the cheater
(black plastic triangle thing!). It should slide out fairly easily. If not, then
check you haven't missed any of the previous steps!!! |
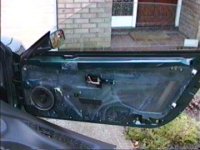
Now where did that door panel go? |
And as if by magic...
The
door without the door panel in place is a sight for sore eyes, well unless
you're going for the stripped out racer look - and all the associated rattles,
noise, etc etc. |

The
screws holding on the speaker |
Step
4 - Speaker removal
The only thing that's between you and you're broken
window stop is the door speaker. This is easy to remove and leaves a gaping hole
to work through. Start by locating the three screws that hold it in place. There
are two at the top and one securing the bottom (or "bass" of the
speaker - sorry, I couldn't resist such a bad pun!) |
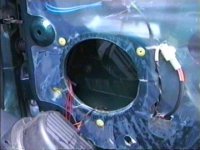
Speaker removed for access |
With the speaker removed, you'll
now have access to the window and the inside of the door. Now is a good time to
rummage about in the bottom looking for the broken window stop.
Make
sure that you get rid of all the bits of it (mine was in two main bits) or
they'll rattle about later on and really annoy you - after all, you wouldn't
want to take it all to bits again would you?
P.S. Now's a good time to
check the door drainage holes aren't blocked too! |
A broken Mk2 window stop |
By now you should have found the
offending item that looks something like this. This is the Mk2 version (from my
January 1998 MGF). The Mk1 is virtually identical but made from white plastic.
I'm not sure whether MG thought that changing the colour would improve things,
surely they wouldn't have made is stronger as well as changing the colour would
they? |
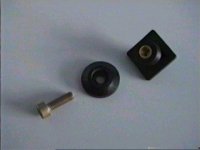
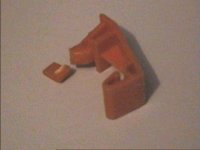
The unassembled components of the Mk3! |
And here are the three parts
that make up the Mk3 version of the window stop. You should have bought before
taking your door to bits so I hope for your sake you did, otherwise it's back on
with the door panel and down to your local dealers parts department! |
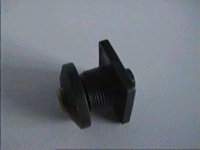
How the Mk3 components go together |
And three become one...
The
parts fit together in the same order as they are laid out in the picture above.
The hexagonal screw fits into the washer (the head really does fit "into"
it too) which then screws into the biggest plastic bit. When this is on the car,
the window glass fits between the washer and the big plastic bit! |
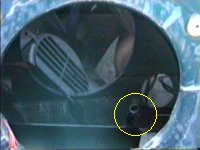
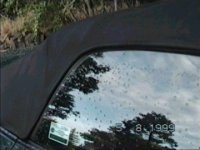
The hole in the glass for the window
stop |
Step
5 - Fitting the new window stop
First of all wind your
window down (well, press the button to do so) until there's about 5cm of window
still above the top of the door. This puts the glass in the correct position so
you can see AND get your hand behind the glass.
If you look "through
the speaker hole" (cue Lloyd Grossman) you will see a hole as marked on the
photograph to the left. This is where your window stop will be going. |
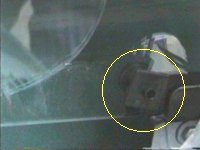
The window stop fitted |
Put the allen key into the
hexagonal screw and fit the washer over the screw. Now comes the fiddly bit,
you've got to get the screw behind the glass and poking through the hole towards
you. Once in place, just tighten the plastic nut by hand then further tighten it
using the allen key which should still be in the screw!
I thought this
went fairly smoothly, but some people have reported much swearing and
frustration at this point, how about you?
With
this done, test out that everything works a few times just to make sure that
nothing snags, and that the window does actually stop! |
Re-fitting the door panel |
Step
6 - Refitting the door panel
Now the jobs done, it's
just a case of putting things back together, simple eh? First of all wind the
window all the way down as it makes this next bit easier.
Place the top
corner of the door panel above the top of the door and make sure that the
re-enforced (with metal) lip fits over the inner lip of the door. Now carefully
bring the back of the panel down making sure that this lip stays on the on the
same side all the way along.
When the panel is "hooked" onto
the door, it should slide forwards into the correct position with all the screw
and clip holes lining up.
Now push all the clips along the bottom of
the panel back in and put all the screws back into their correct positions
(remember, the small one is for the opening handle!). |
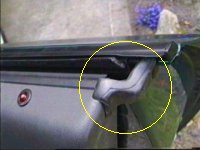
Make sure this rubber bit is fitted back
on |
Step
7 - The final touches
Right, that's just about it. Just
one thing to make sure and more than likely put right. There's a strange shaped
rubber thing that fits at the top rear of the door. This should be positioned as
the photograph and the small flaps of rubber force behind the panel.
You'll
know what I mean when you come to do it! |
Fitted and working! |
Step
8 - A job well done
Well done, you've finished! You can
now take pride in the fact that you've saved yourself £40 by repairing the
window stop yourself and you've also learned just how easy it is to take the
door panel and speakers out.
So, why not use the money to buy some high
quality replacement speakers - then go back to step 1 again, doh! |