![]()
Anti-roll bar
mounting bush
replacement
|
Words and Pictures: Colin
McIlwaine |
|
|
Anti-roll bar
mounting bush
replacement
|
A Simple Job
Goes Terribly Wrong – Part 1
After getting the Hydragas
re-pumped back to factory settings, I began to notice a rather worrying grinding
or creaking noise coming from the front-end. It was particularly noticeable
when turning left at speed or hard left at a crawl (multi-storey car parks were
quite embarrassing), when I could feel vibration through the pedals and steering
wheel in addition to the racket from under the car.
A quick investigation (offside
wheels on a high curb) revealed that the offside anti roll bar bush had totally
disintegrated. Brown & Gammons to the rescue (and why not replace the rears
too?):
|
> BGF9103 - FRONT ANTI-ROLL BAR BUSH
(PAIR) > BGF9108 - REAR ANTI-ROLL BAR BUSH (PAIR) |
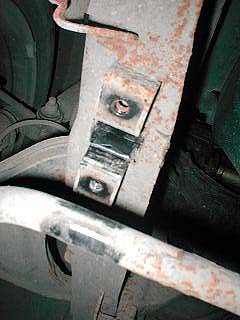
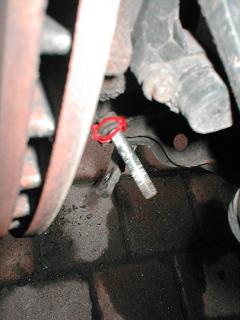
Removing
Rounded Out Wheel Nuts
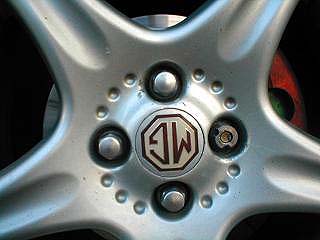 Above: rounded lock nut 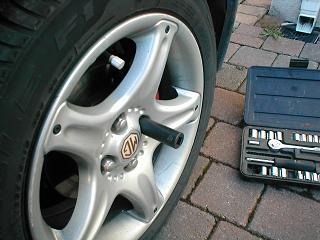 19mm socket being used to remove old lock nut |
Unfortunately, several weeks
previous (in another spate of MGF DIYing), I managed to strip the little bars
inside the locknut adapter (and inconveniently round out the ‘keyholes’ in the
wheel nut too).
A new set of four standard
wheel nuts promptly arrived and I began the arduous task of removing the lock
nuts without the aid of an adapter.
The standard nuts are removed
using a 19mm socket or tyre wrench, so the most obvious solution is to get an
18mm (or ¾”) socket, a lump hammer and understanding neighbours. Hammer the
slightly-too-small socket onto the locknut as far as it can go and simply undo
it.
Getting the locknut back out
of the socket is another matter altogether!
Replacing the
Front Anti Roll Bar Bushes
Replacing the front ARB bushes is quite straightforward (famous last words Colin? - Ed).
| 1. |
Raise the front of the car in
the usual manner, following the usual safety precautions. |
|||
| 2. |
Using a 10mm socket, remove the
four nuts from the two clamps; the ARB will drop slightly (it’s still
connected to the ARB suspension links). |
|||
| 3. |
At this point, the old bushes can be removed; clean down the anti roll bar and refit the new bushes, aligning them with the brackets. Refit the clamps and tighten the bolts to 22Nm.
Those of a fair disposition may want to skip straight to step (4) at the bottom of the page... |
How It All
Went Askew
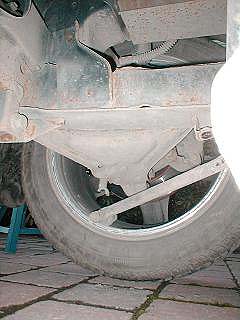
Earlier I said that the anti roll
bar will drop slightly since it’s still connected to the ARB suspension
links. If, for instance, it’s not connected on one side, then the ARB will
completely drop and give you a hefty whack on the forehead.
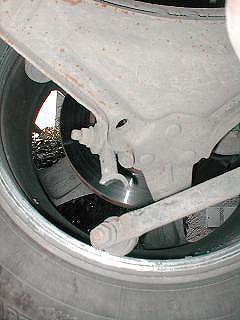  |
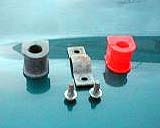
In my case, the nearside link had completely sheared.
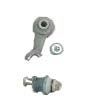 |
Pictured left, the removed drop link:
note how 2/3 of the 'eye' is now missing: this would certainly give rise
to some nasty suspension noises!!! More pictures to the right. |
Now the grinding and creaking made
sense: it was the half of the link still connected to the lower suspension arm
rubbing against its other half (which was swinging around on the end of the ARB).
Brown & Gammons to the rescue
(again):
> RBM100111 - MGF ANTI ROLL BAR
LINK ASSY LH
> RBM100101 - MGF ANTI ROLL BAR
LINK ASSY RH
Since I would have several days
before these assemblies arrived, I thought it was prudent to completely remove
the two halves.
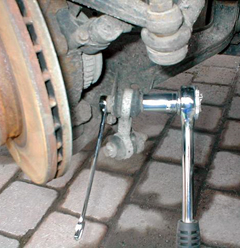
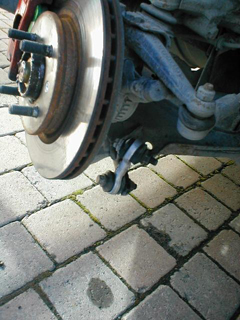
In the case of the ARB end, a 13mm
socket is sufficient to remove the link half. Awkwardly, the suspension arm end
required that the road wheel be removed to allow room for a 15mm spanner to stop
the bolt turning as the 15mm socket undid the nut. More awkwardly, the bolt
cannot be fully removed from the suspension arm; as an interim solution, I cable
tied the bolt in place so that it would not interfere with the hub at an
inopportune moment.
To be continued….
A Brief Interlude – Removing Sheared Locknuts
 Earlier, I gave
some details on removing locknuts (or rounded-out standard nuts incidentally)
without the use of the adapter. But what happens if the ‘slightly too small’
socket simply spins around the nut? Using a progressively smaller socket would
seem to be the most obvious solution. What happens, then, if you’re down to a
16mm socket and it’s still spinning? Indeed, what happens if the fore end of
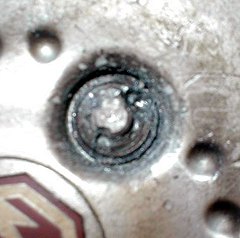
the locknut shears off, leaving a still intact aft end holding the wheel on?
Well, it looks something like this
(see picture, right):
Earlier, I gave
some details on removing locknuts (or rounded-out standard nuts incidentally)
without the use of the adapter. But what happens if the ‘slightly too small’
socket simply spins around the nut? Using a progressively smaller socket would
seem to be the most obvious solution. What happens, then, if you’re down to a
16mm socket and it’s still spinning? Indeed, what happens if the fore end of
the locknut shears off, leaving a still intact aft end holding the wheel on?
Well, it looks something like this
(see picture, right):
Thanks to advice
from Mike Satur (http://www.mikesatur.co.uk/),
the solution is to use a cobolt drill bit to drill along the outside length of
the stud, through the locknut. (I found a 5mm or 6mm to be the most useful size
to clear the inside edge of the alloy.) This can take some time, particularly
if you need to drill several holes around the circumference of the stud (as I
did). Also, take care to not allow the drill bit to ‘wander’.
 The only downside
to this approach is that you will undoubtedly need to replace the stud; the
threads will not have survived the contact with the cobalt drill bit!
The only downside
to this approach is that you will undoubtedly need to replace the stud; the
threads will not have survived the contact with the cobalt drill bit!
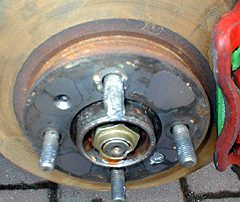
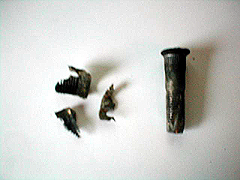 The
offending locking wheel-nut is pictured here, with the wheel stud to the right,
in all their cobalt-drilled glory! (
The
offending locking wheel-nut is pictured here, with the wheel stud to the right,
in all their cobalt-drilled glory! (![]() Enough to put a shiver down your spine, eh? - Ed)
Enough to put a shiver down your spine, eh? - Ed)
Part 2 - Back To The Drop Links
| 4. |
Drop links installation is simply the reverse of
removal. It may be necessary to loosen the ARB bush clamps to allow a little
‘play’ in the ends of the ARB.
Tighten the two nuts (ARB end and lower suspension arm end) to 35 Nm (with suspension at nominal trim height). If necessary, retighten the ARB bush clamps to 22Nm.
Job done.
|