|
How to fit an MGF high level Brake light |
|
How to fit an MGF high level Brake light |
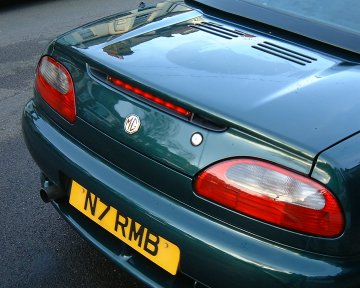
| What's a high level brake light? It's the
additional (3rd) brake light that on the MGF and TF is found mounted in the centre of the
boot lid. The advantage of this brake light is increased visibility - to others -
hopefully giving additional warning that you are decreasing speed. For this benefit alone, the high level brake light (HLBL) is a worthwhile fitting, although some will add it for the aesthetic improvement - filling in an area of blank black plastic, and perhaps 'modernising' an older car's rear end looks. You can get a HLBL from your local dealership, although kits are also available from a number of sources, including Brown and Gammons, Mike Satur and Moss. These units can also be ordered from your local motor factor - and the part number information is included below. |
 |
| Parts required: |
(cheapest source for the light is Tony Stafford- 01827 67714, pricet was 12 GBP at time of writing) Also consider contacting Hella - Hella (UK) 01295 27 22 33 for details of your local stockist Or, if the whole kit is wanted:
|
| Tools required: |
|
| Time required: |
|
Instructions
| 1 | Remove any items from the boot. Get your manual handy, as you will need the codes for the stereo. |
|
|||
| 2 | Remove the black plastic trim from the boot lid- secured by two black phillips screws. | ||||
| 3 | The plastic trim has a scoured push out that needs to be removed to allow the lighting cables to pass through the trim to the brake light. Remove this, and the black rubber grommit blank from the boot lid itelf. | 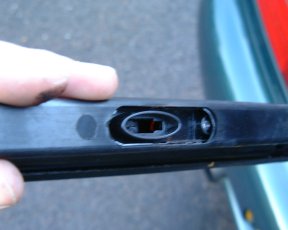
Cut out in boot trim removed and HLBL fitted |
|||
| 4 | Cut a length of 5 amp cable twice the length sufficient to run from the left hand rear lamp cluster, through the boot, the top left of the engine bay, through the internals of the boot lid and out through the brake light apperature.3- 4 metres should be more than adequate. DO NOT CUT IN HALF YET! | ||||
| 5 | Fold the cable in half, so that both ends hang equally. | ||||
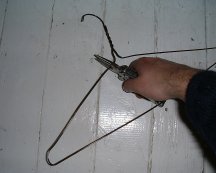
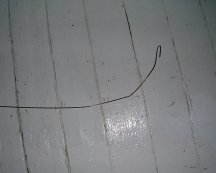
| 6 | Fashion the wire feed tool
from the old coat hanger:
|
||||
| 7 | Pull out the cable grommet from the left front edge of the boot lid, and pass the brake light cable through- non-free end first so that the wire feed tool has something to hook onto. | ||||
| 8 | Pass the wire feed tool through one of the access holes to the cavity in the bootlid and hook the brake light wire. Pull and withdraw the wire feed tool, and in so doing pulling the brake light cable with it. Withdraw a shoot loop of the cable through the apperature. | ||||
| 9 | Pass the wire feed tool through the space between the panels adjacent to boot lamp, and then hook the brake light cables once again. Then manoever the cable through the hole in the boot lid brake light cable apperature and pull the cable firmly but gently through. Pass a rubber grommet over the cable and into the apperature to prevent chaffing of the brake light cable. | ||||
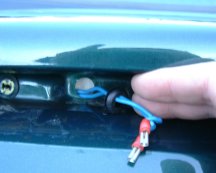
| 10 | The wire can now be cut, and the female spade (Lucar) connectors fitted (or the appropriate Hella connector). |
Lucar connectors attached, andgrommet being pushed into place |
|||
| 11 | The other end of the cable, re fix the cable pass grommet to the boot lid, and with electrical tap secure the brake light cables. Pass these cables through the engine compartment (securing as you go) and into the boot. You will need to expose the inner boot panels by pulling back the carpet. | 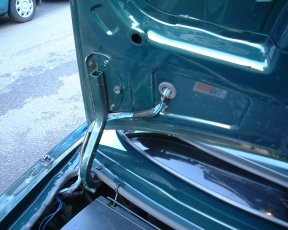 |
|||
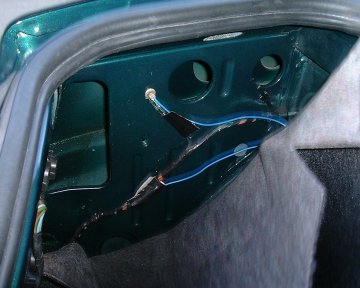
| 12 | Splice on cable to the rear light cluster brake light feed cable (green cable with purple tracer, pictured right, top), and the other onto an earth wire (or alternatively mount directly to the earthing bolt on the left hand 'wall' of the boot compartment - as shown right, bottom). | 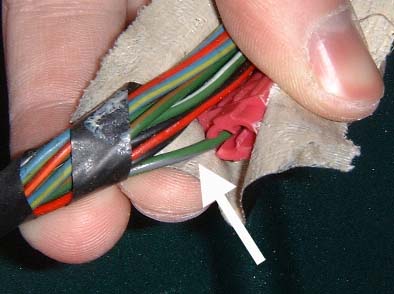
|
|||
| 13 | The other end of the cable now, thread the cables through the brake light trim, and puss the Lucar connectors to the brake light. Polarity is not important on the standard Rover brake lamp. | ||||
| 14 | Push the lamp into the trim, and use longer screws to attach the brake lamp and trim to the boot lid. | 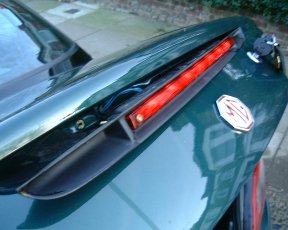 |
|||
| 15 | Now reconnect the battery, turn on the ignition, and get a friend to press the brake pedal to ensure the operation of the lamps. | 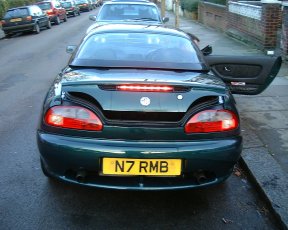 |
|||
Hey presto- one operational high level brake lamp for very little money! |