![]()
Coolant
Bleed Procedure
Words and pictures by Dave Livingstone
|
Coolant
Bleed Procedure |
Ensuring that the cooling system is clear of all air is essential: air bubbles act as highly efficient 'plugs' to impede water flow. If this happens, the engine can over heat - which could mean failure of the head gasket - or even more expensively, warping of the alloy engine castings. Here Dave sets out the basic bleed procedure (Dieter has some excellent instructions on how to achieve this too - linked here).
| 1. | Mix required amount of coolant and water in a 50:50 solution – the system holds 10 litres of mixture in total. | |
| 2. | Remove the expansion bottle cap and fill the expansion bottle to the top with coolant. | |
| 3. | Open all of the three bleed
points:
[Dave indicates that all three bleed screws should be open at the same time - and this is how the workshop manual states the way it should be done, however, I usually open one at a time if working on my own so excess fluid doesn't run out - Rob] |
|
| 4. | As coolant starts to flow out of each bleed point at a constant rate, close the bleed screw. You shouldn’t find that the expansion bottle empties before this happens, but keep an eye on it and top it up if necessary. [It may be helpful to have a willing assistant to help out with this - Rob] | |
| 5. | Fill the expansion bottle back up and screw the expansion bottle cap back on securely. | |
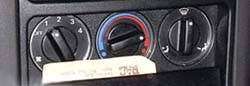
| 6. |
Turn the heater to the maximum hot position. |
|
| 7. | Start the engine. | |
| 8. | Check for leaks around the car, particularly the clips on the hose. | |
| 9. | After 20 – 30 mins the engine should have reached normal working temperature and the radiator fan should come on. Switch off engine. | |
| 10. | Open each bleed point to allow any trapped air to escape. As soon as coolant runs freely from a bleed point close it. | |
| 11. | Tighten all the bleed points: a. Radiator bleed screw (Torque to 5 Nm) b. Heater matrix bleed screw (Torque to 7 Nm) c. Heater Bypass/Return bleed screw (Torque to 5 Nm) |
|
| 12. | Allow the engine to go completely cold. | |
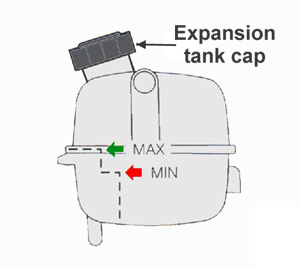
| 13. | Check the coolant level in the expansion bottle. Top up or remove fluid until the coolant level is at the maximum mark – the higher of the two plastic ledges that can be seen inside the expansion bottle on the side nearest the back of the car. | |
| 14. | Ensure that the expansion bottle cap is securely screwed back on. | |
| 15. | Repeat steps 6 to 11 above for 100% confidence that there is no air in the system. | |
| 16. |
Last check: ensure that the coolant level is at 'max' mark on expansion tank, and top up if necessary. |