 Fitting
a KH assemblies front splitter
 Fitting
a KH assemblies front splitter
Tools you’ll need:
A plumb line (or something heavy on a piece of string), an electric drill, set of spanners, a secure way of raising the front of the car (NOT BRICKS!) A handy helper may be useful too- but if one isn’t available then two G-clamps can be used to help keep the splitter assembly in one place.
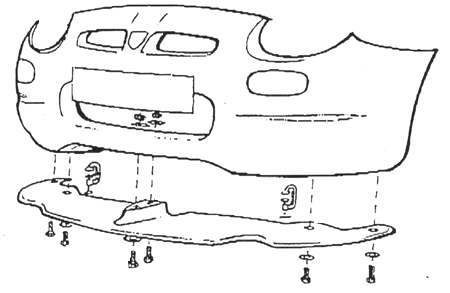
Supplied in the kit should be a Splitter, pre-drilled with washers, nuts and bolts x 5. The nuts are not of the nyloc variety- HOT TIP: buy some Nylocs or spring washers from your local motor factor (e.g. Halfords) as these nuts do not shake lose over time.
1. Securely raise the front of your car so that you have clearance to get your electric drill under the bumper.

2. Offer up the splitter to the bottom of the bumper, ensuring that it is as far back as it will go.
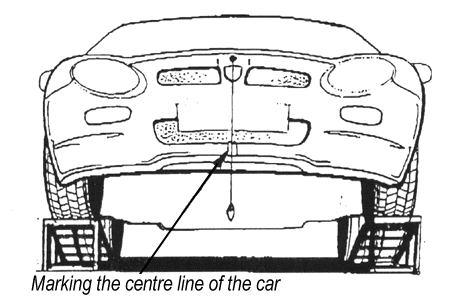
3. Check that it is central under the bumper, the manufacturer recommends using a plumb line from the middle of the Grill’s MG badge. Alternatively, make sure that each extreme of the splitter is even under the bumper [the same overlaps each side, and same distances from the wheel arch].
4. With the aid of a friend holding or G-clamping the splitter in place, keep the splitter firmly in place and drill the centre guide holes for the attachment bolts. You may find that the centre spar of the splitter has two guide holes- if so use them both and bolt up the splitter. Alternatively drill two holes of your own!

5. Now go for a drive, cynical that this is purely a pleasing aesthetic device, and return impressed that it really does work as advertised!