1. Loosen road wheel nuts.
2. Jack up the rear of the car, having choked the front wheels. Make safe by securing car onto an axle stand. Remove road wheel.
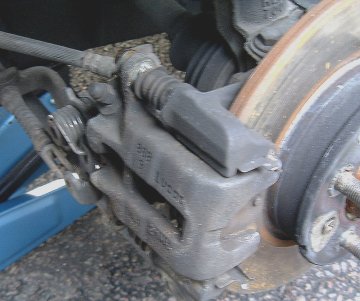
3. Rear calliper is a of a sliding calliper design. The one piston forces both pads either side of the disc rotor onto its surface. The two halves of the calliper are bolted together with two bolts. Remove both of these bolts, and remove outer half of calliper, and hang safely to one side, taking care not to stretch the brake hose.
4. Remove the old brake pads- they should fall out easily.
5. The calliper piston is now obvious. Notice that it has ‘lugs’ on its surface to aid rotation: the piston needs to be screwed back into the calliper in order to insert the new brake pads. Use the special tool to aid with this, or use an old screw driver etc. to turn the piston clockwise. Keep an eye on the master cylinder reservoir to make sure that the hydraulic fluid being pushed back into the brake circuit is not over flowing!
6. Once the piston has been screwed back home, clean up the calliper with a scraping tool (that old screw driver again!), wire brush and some brake cleaning spray (available at Halfords).
7. Slide in the new brake pads, and reassemble the calliper. Torque is 45 Nm for these bolts.
8. Replace the road wheel, and lower the car back to the ground. Torque wheel nuts to approx. 65 lb.ft
9. Once completed, reset the piston by repeated application of the brake pedal until it starts to feel firm once again.