|
Words and pictures: Rob Bell |
|
|
How to replace the Hardtop
headliner
|
Introduction
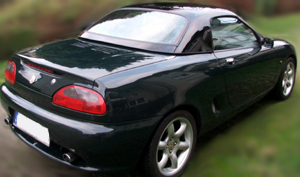 I really like my hardtop. I know that you can have a soft
top with a glass rear screen these days - and yes, that means you can go
roofless on fine winter's days, but I like the transformation of the car when
the hardtop goes on. No longer a canvass-roof roadster, but now a snug two-door,
two-seat coupe with a large heated rear glass screen: the rearward view is
panoramic. Also, with a light-coloured head lining, the car's cockpit is a
surprisingly light and airy place in which to spend time. That it is also
quieter and somehow seems to stiffen the structure of the car when fitted are
further advantages not often declared. And did I mention it transforms the look
of the car? On the Mk1 MGF, with the gloss black windscreen frame, combined with
a gloss black hardtop, the MG cuts a fine figure on the road.
I really like my hardtop. I know that you can have a soft
top with a glass rear screen these days - and yes, that means you can go
roofless on fine winter's days, but I like the transformation of the car when
the hardtop goes on. No longer a canvass-roof roadster, but now a snug two-door,
two-seat coupe with a large heated rear glass screen: the rearward view is
panoramic. Also, with a light-coloured head lining, the car's cockpit is a
surprisingly light and airy place in which to spend time. That it is also
quieter and somehow seems to stiffen the structure of the car when fitted are
further advantages not often declared. And did I mention it transforms the look
of the car? On the Mk1 MGF, with the gloss black windscreen frame, combined with
a gloss black hardtop, the MG cuts a fine figure on the road.
 The thing is, my hardtop has reached 17 years of age, and
spends much of the year stored in a garage. When I came to fit the hard top to
my car last winter I discovered that the headlining material had completely
failed - the whole thing sagged down and I was effectively wearing it as a hat.
This meant a sad MGF owner. The time had come to sort out a replacement.
The thing is, my hardtop has reached 17 years of age, and
spends much of the year stored in a garage. When I came to fit the hard top to
my car last winter I discovered that the headlining material had completely
failed - the whole thing sagged down and I was effectively wearing it as a hat.
This meant a sad MGF owner. The time had come to sort out a replacement.
This is not the first guide on how to replace the headlining material - but since there is inevitably more than one way to do anything, there is no harm there being another guide on headliner replacement so you can plan your own. What follows is how I did it...
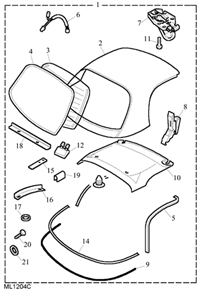
Before progressing further, it is probably worth quickly noting how the hardtop is constructed (see parts figure on the left). Component #10 is the headliner assembly, which consists of a rigid, lightweight composite panel that forms the three-dimensional shape of the headlining material. To this is bonded the fabric covering, which is itself foam backed and is no more than 1-2mm thick.
When the headlining starts to sag, it isn't because the glue has given up the ghost (in fact it remains tacky to touch), but because that foam - which gives the lining its soft, quality feel as well absorbing noise - has oxidised and disintegrated.
At the time of writing, X-Part still has the headlining assembly still listed as available for standard hardtops (note that the "Heritage" style hard top may have a different liner assembly) - but at a cost of over 230 quid, probably a smidge too expensive for most. A DIY repair is simple enough and can be undertaken for considerably less cost...
The first step was to find a suitable replacement. I
called upon the advice of BAS International - a company well known for supplying
replacement soft tops for MGs and other marques. They did not have any headliner
replacement kits, but
they were kindly able to provide a suitable replacement material along with a contact adhesive that
they had tried and tested to be ideal: the glue does not seep through and stain the material you
plan to fit... You can of course source your own materials and classic car shows
will usually have a vendor supplying head lining material at discount prices.
| Tools Required | Materials Required | Time Required | ||
|
|
|
You'll need quite a large working space - I used our kitchen area...
| 01 |
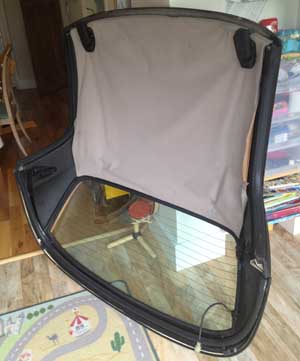  Bring
your hardtop into your workspace - I'll show you here what my hard top
looked like: the lining was a mess! The foam backing of the material had
turned to dust, and the lining was barely being held in place by the edges.
Oh dear. Overdue replacement! Bring
your hardtop into your workspace - I'll show you here what my hard top
looked like: the lining was a mess! The foam backing of the material had
turned to dust, and the lining was barely being held in place by the edges.
Oh dear. Overdue replacement! |
| 02 |
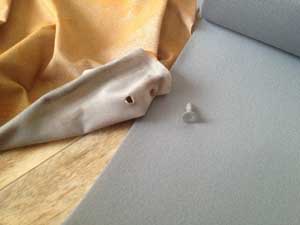
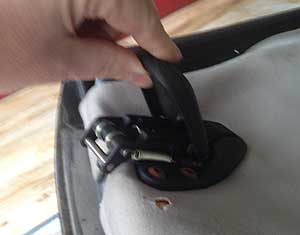 Open
the retaining catches at the front so you can access the clamp retaining
screws. Open
the retaining catches at the front so you can access the clamp retaining
screws.Note hole in the headliner near the catch: that had been annoying me for the last couple of years... the solution was at hand though! |
| 03 |
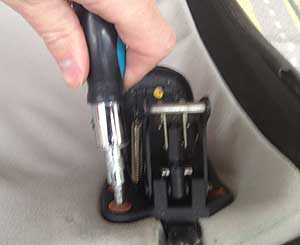 Now
you can remove the screws. You can see that on mine, they had rusted and
looked extremely unsightly. You could replace with stainless steel
replacements (from your favourite internet auction site again). I didn't: I
wire-brushed them and repainted in satin-black Smoothrite. Now
you can remove the screws. You can see that on mine, they had rusted and
looked extremely unsightly. You could replace with stainless steel
replacements (from your favourite internet auction site again). I didn't: I
wire-brushed them and repainted in satin-black Smoothrite. |
| 04 |
 Catch
handles now removed. The sagginess of the head lining revealed even more
clearly in this shot I think even though the hardtop was upside-down! Catch
handles now removed. The sagginess of the head lining revealed even more
clearly in this shot I think even though the hardtop was upside-down! |
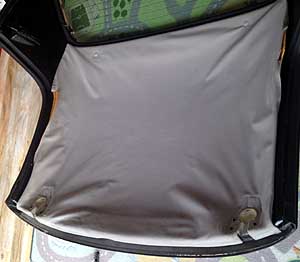
| 05 |
 There
are three Velcro tabs that need to be prised apart: one in the centre of the
headlining, near the front rail between the catches and two either side, a
couple of inches behind the catches (shown in picture here). There
are three Velcro tabs that need to be prised apart: one in the centre of the
headlining, near the front rail between the catches and two either side, a
couple of inches behind the catches (shown in picture here). |
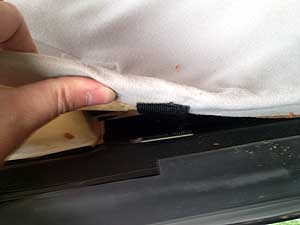
| 06 |
 There
are two trim retaining clips at the rear of the headlining - these are of
the "fir tree" variety - so called because someone obviously thinks they
look a bit like a fir tree. I'd like to know what drugs they were taking,
but anyway... they're a push-fit into a hole and need prising out. I thought
I could do this without damaging the retainers and re-use them. I was wrong:
the plastic is over 17 years old and more fragile as a result. I'd
recommended buying some replacements before starting! There
are two trim retaining clips at the rear of the headlining - these are of
the "fir tree" variety - so called because someone obviously thinks they
look a bit like a fir tree. I'd like to know what drugs they were taking,
but anyway... they're a push-fit into a hole and need prising out. I thought
I could do this without damaging the retainers and re-use them. I was wrong:
the plastic is over 17 years old and more fragile as a result. I'd
recommended buying some replacements before starting! |
| 07 |
  When
I bought my headlining material, I genuinely wasn't quite sure how much I
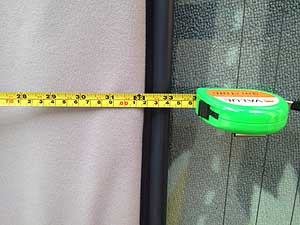
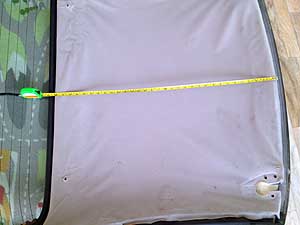
needed - so here are few pictures that may prove of help. Essentially,
you'll need approximately 1.5 x 1.0 metres - which should be ample. When
I bought my headlining material, I genuinely wasn't quite sure how much I
needed - so here are few pictures that may prove of help. Essentially,
you'll need approximately 1.5 x 1.0 metres - which should be ample.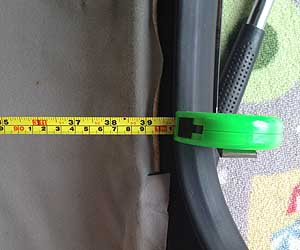 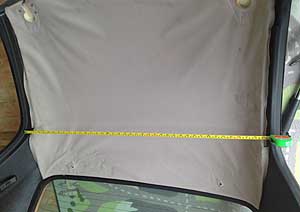 |
| 08 |
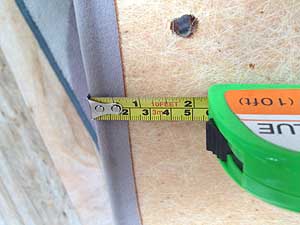 Here's
a picture of the overlap - typically between 10 to 25mm Here's
a picture of the overlap - typically between 10 to 25mm |
| 09 |
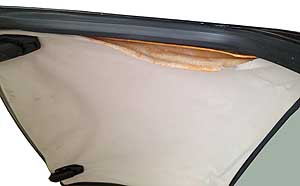
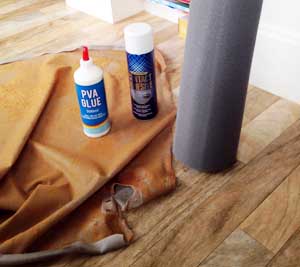 Materials
needed: roll of headlining material on right, contact adhesive and PVA glue
on left. Materials
needed: roll of headlining material on right, contact adhesive and PVA glue
on left.The orange material is what remains of
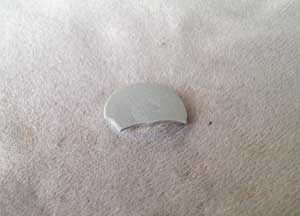
the foam backing of the old head headlining... yuk. |
| 10 |
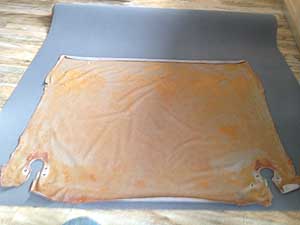 The
old headlining material can been peeled from the rigid liner - sometimes
also known as the "biscuit". If refer to this rigid headlining
backing/shaper henceforth as the biscuit, so you know. Removal of the
headlining material took no effort at all on my hardtop, as effectively it
had detached itself already! The
old headlining material can been peeled from the rigid liner - sometimes
also known as the "biscuit". If refer to this rigid headlining
backing/shaper henceforth as the biscuit, so you know. Removal of the
headlining material took no effort at all on my hardtop, as effectively it
had detached itself already!Take the material and lie it on top of the replacement material, lying it as flat as you can. Easier said than done: the material will have inevitably have stretched in places... Fortunately the shape is pretty symmetrical, but I think it makes sense to try and make sure that you lie the material in the correct orientation - but not critical. |
| 11 |
 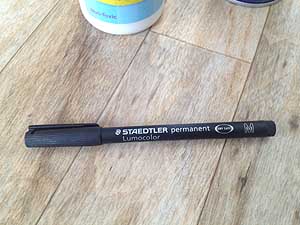 I
used a permanent marker pen to trace an outline around the old headliner
onto the back of the new material - also marking where the original had cuts
to aid the material to be folded as a return lip tightly on the biscuit's
reverse side. I
used a permanent marker pen to trace an outline around the old headliner
onto the back of the new material - also marking where the original had cuts
to aid the material to be folded as a return lip tightly on the biscuit's
reverse side. |
| 12 |
 Having
traced around the edge of the old headlining, this can be discarded and the
new material cut according to the template you've just drawn. I didn't take
any pictures of this stage, I'll leave that to your imagination. Sharp
scissors make light work of the task. Having
traced around the edge of the old headlining, this can be discarded and the
new material cut according to the template you've just drawn. I didn't take
any pictures of this stage, I'll leave that to your imagination. Sharp
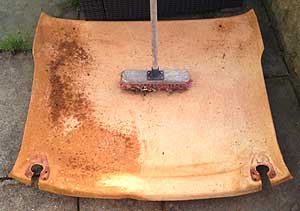
scissors make light work of the task.Were not quite ready to bond this to the biscuit yet. It will still be covered with the remnants of rotten foam which will make a poor surface to glue to. The next stage therefore is to remove this material. A stiff brush makes light work of this I found - note the use of a garden brush used to clear the paths of fallen autumnal leaves - perfect! |
| 13 |
 The
hard brush method worked so well that I am not sure I really needed to do
this next step, but I took the advice from the chaps at BAS and stabilised
the surface with PVA glue. I mixed a 50:50 water/glue mix and brushed this
onto the biscuit. Any loose material would now be bonded to the biscuit, and
should make an ideal surface for the contact adhesive once dry. The
hard brush method worked so well that I am not sure I really needed to do
this next step, but I took the advice from the chaps at BAS and stabilised
the surface with PVA glue. I mixed a 50:50 water/glue mix and brushed this
onto the biscuit. Any loose material would now be bonded to the biscuit, and
should make an ideal surface for the contact adhesive once dry. |
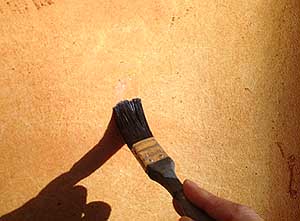
| 14 |
 Not
much more to do now. I sprayed the contact adhesive in accordance to the
manufacturer's instructions and allowed the glue to become touch dry (I also
applied the adhesive to the reverse of the biscuit to take the return-lip of
the material. Not
much more to do now. I sprayed the contact adhesive in accordance to the
manufacturer's instructions and allowed the glue to become touch dry (I also
applied the adhesive to the reverse of the biscuit to take the return-lip of
the material.Next the material was carefully applied to the biscuit - the key landmarks being the circular holes for the hardtop catches. Working from the middle outward, and taking time around the 3-dimensional shapes and then getting the material to neatly go around the return lip of the biscuit's perimeter. I am delighted with the end result - but if I were to do the job again, I might make the material perhaps a smidge larger than the original to make things a bit easier for myself. |
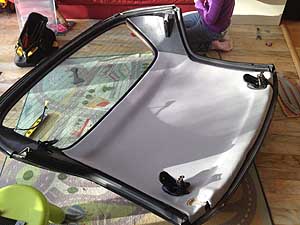
| 15 | The final tasks are to re-fit the catches (I had to wait a while for repainted screw heads to dry first) and put back the rear trim clips, and the job's a good one! One beautiful, ripple-free head lining that is fresh and clean: it really makes a huge difference compared to the old, dirty, sagging and slightly torn original; certainly worth all the effort! |
 The
colour match with the new headlining isn't bad - the new one is a bit
darker. You might be able to find something better?
The
colour match with the new headlining isn't bad - the new one is a bit
darker. You might be able to find something better?