 You will also require some thread lock compound - I used
medium strength Loctite thread lock (pictured here, to the right).
You will also require some thread lock compound - I used
medium strength Loctite thread lock (pictured here, to the right).
Retrofitting Roof Rails
Although all Rover 75 Tourers were fitted with these practical roof rails as standard, it's MG sibling, the ZT-T, did not. Which is a little annoying if you are an MG owner - having the availability of a roof rack or similar is a huge practical advantage. But fear not - retro fitting roof bars to your MG is actually surprisingly simple - here's how:
A complete set of brackets and a pair of roof rails - these can be sourced from a scrap yard (which is what I did) for between £65 - £100.
Or you can order, new from X-Part:
Approximately 90 minutes
| 1. |
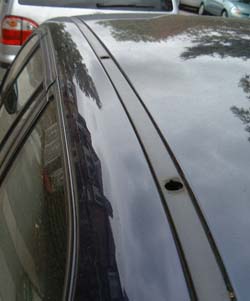
 Here's a
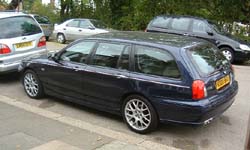
shameless opportunity to show off our pride and joy - a 2003 ZTT CDTi + in
Royal Blue. The reason for showing this now is that we can see what the car
looks like with out the roof rails. I guess the roof-rail-less look is meant
to be more sporty? For me though, I think that the car is missing
something... missing roof rails!!! Here's a
shameless opportunity to show off our pride and joy - a 2003 ZTT CDTi + in
Royal Blue. The reason for showing this now is that we can see what the car
looks like with out the roof rails. I guess the roof-rail-less look is meant
to be more sporty? For me though, I think that the car is missing
something... missing roof rails!!! |
| 2. |
 Here's what you
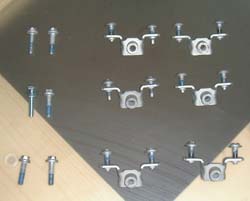
should have: 6x 'T'-shaped brackets, 12x torx head screws and 6x 7mm headed long-bolts. Here's what you
should have: 6x 'T'-shaped brackets, 12x torx head screws and 6x 7mm headed long-bolts.You'll notice that there is a blue residue on the bolt threads - this is thread lock used by Rover to ensure that the roof rails do not rattle loose in use (with the inevitable disastrous consequences for your luggage...). |
| 3. |
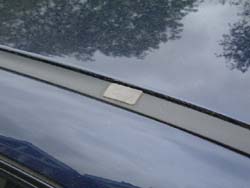
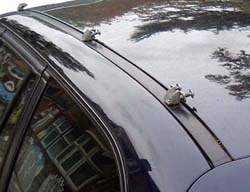
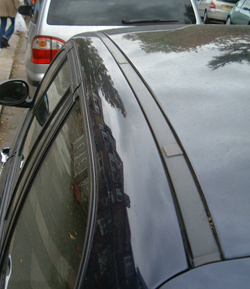 The first
step is to identify the blanking grommets in the roof. These are visible in
the picture opposite: the rectangular tabs in the drainage channel trim. The
rear most two are obvious in this picture - the front one is out of sight
due to the curvature of the roof, but is self evident when you go to look. The first
step is to identify the blanking grommets in the roof. These are visible in
the picture opposite: the rectangular tabs in the drainage channel trim. The
rear most two are obvious in this picture - the front one is out of sight
due to the curvature of the roof, but is self evident when you go to look. |
| 4. |
 First, a close up of the grommet. On my car, they'd discoloured badly - another source of irritation!
|
| 5. |
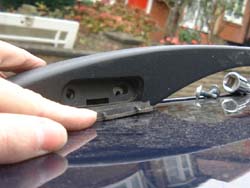
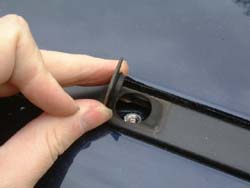 Now remove the
grommet. Mine came off easily using nothing more sophisticated than a finger
nail! Now remove the
grommet. Mine came off easily using nothing more sophisticated than a finger
nail!
Usually, the screw thread below is protected by a plastic cap that can be levered off using a small screw driver. But as can be seen from the picture opposite, this protective cap is conspicuous by its absence, perhaps suggesting that my car had originally been supplied with roof rails that had, subsequently, been removed? |
| 6. |
 Remove all
the caps before moving onto the next stage... Remove all
the caps before moving onto the next stage... |
| 7. |
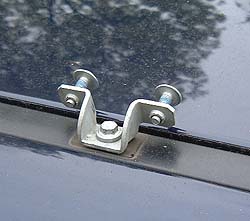 ...
which is to bolt in the brackets. This is very simple - just remember to
orientate the bracket such that the mounting flange is facing towards the
centre of the car. ...
which is to bolt in the brackets. This is very simple - just remember to
orientate the bracket such that the mounting flange is facing towards the
centre of the car. |
| 8. |
 Here are
the three brackets for the left hand side roof rail fitted into place which
serves to emphasise the orientation of the brackets. Here are
the three brackets for the left hand side roof rail fitted into place which
serves to emphasise the orientation of the brackets.Before final torquing down (14 Nm), I made sure that the brackets were in parallel alignment with the line of rain channel. |
| 9. |
 Now we
can drop the roof rail down on top of the brackets. Before doing anything
else, make sure that the rubber boots on the roof rail feet are in place and
are not creased or damaged. Now we
can drop the roof rail down on top of the brackets. Before doing anything
else, make sure that the rubber boots on the roof rail feet are in place and
are not creased or damaged. |
| 10. |
 This step is
meant to be really easy - but in practice is anything but: bolting up the
roof rail to the brackets. The mounting holes are readily exposed by
dropping the rubber cover in the roof rail, as shown opposite. The
problem that you are likely to be faced by can be seen in this picture too:
the alignment of the threaded captive nuts on the brackets and the holes in
the roof rail. Look at the hole on the right: the bracket doesn't quite seem
to align properly. At the end of the day, and after much head scratching, I
found that the best approach to this problem was brute force and ignorance.
Particularly ignorance! So long as you don't cross-thread the bolts, you can
get the bolts to bite into the brackets, thus pulling the rails down onto
the car's roof - which is, I presume, the desired effect. This step is
meant to be really easy - but in practice is anything but: bolting up the
roof rail to the brackets. The mounting holes are readily exposed by
dropping the rubber cover in the roof rail, as shown opposite. The
problem that you are likely to be faced by can be seen in this picture too:
the alignment of the threaded captive nuts on the brackets and the holes in
the roof rail. Look at the hole on the right: the bracket doesn't quite seem
to align properly. At the end of the day, and after much head scratching, I
found that the best approach to this problem was brute force and ignorance.
Particularly ignorance! So long as you don't cross-thread the bolts, you can
get the bolts to bite into the brackets, thus pulling the rails down onto
the car's roof - which is, I presume, the desired effect.Start from the rearmost bolt hole (the only one not to be slotted) and work your way forwards. This is where the step ladder comes in handy, by the way! I would also urge you to remove any clothing that has exposed zips or other sharp protrusions as you are likely to be resting against easily scratched paintwork... |
| 11. |
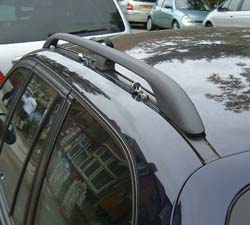
 Now repeat
for the other side (much quicker than the first due to practice!) and you'll
end up with something like that shown opposite: two securely fastened roof
rails! Now repeat
for the other side (much quicker than the first due to practice!) and you'll
end up with something like that shown opposite: two securely fastened roof
rails!
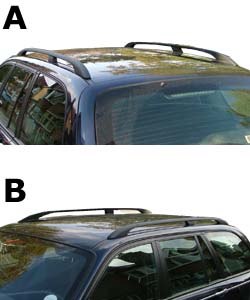
The finishing task is the replace the rubber boot tabs to hide the retaining screws, and the job's a good 'un! A = from the rear |
| 12. |
 These
instructions started off with a picture of my car before the roof rails were
fitted. It seems only fitting to end it with a picture with them fitted -
the car finally looks 'finished'! These
instructions started off with a picture of my car before the roof rails were
fitted. It seems only fitting to end it with a picture with them fitted -
the car finally looks 'finished'! |